Introduction to Scarlet Cocoa Serenade Ice Cream
The Allure of Homemade Ice Cream
There’s something magical about homemade ice cream. It’s not just a dessert; it’s an experience. When you make ice cream at home, you control every ingredient. You can choose the freshest fruits, the finest cocoa, and the sweetest cream. This means you can create flavors that are unique to your taste. Plus, the process of making ice cream can be a fun activity for family and friends. Imagine gathering in the kitchen, laughing, and creating something delicious together. Homemade ice cream brings joy and satisfaction that store-bought versions simply can’t match.
Why You Should Try Scarlet Cocoa Serenade Ice Cream
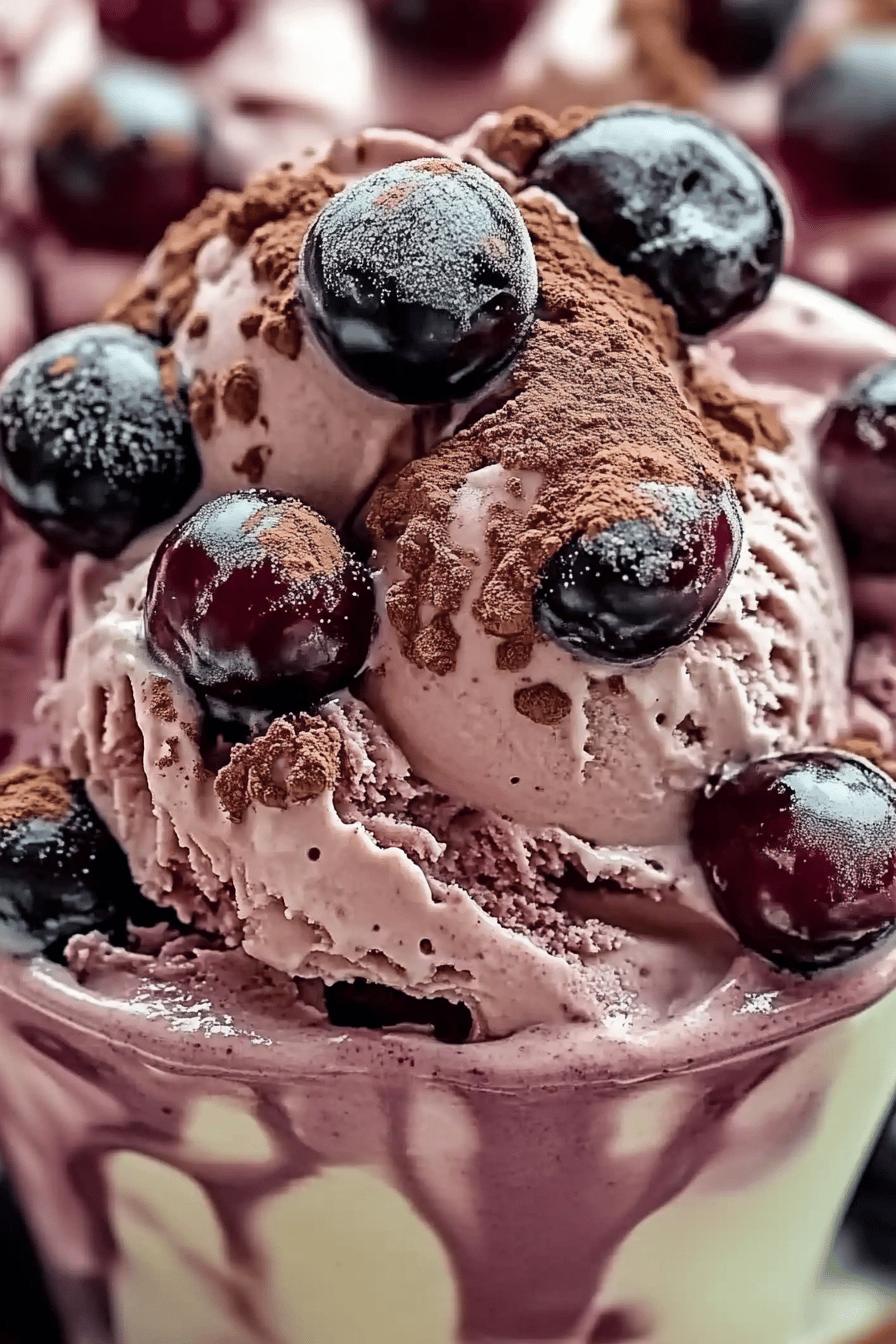
Scarlet Cocoa Serenade Ice Cream is a delightful blend of flavors that will tantalize your taste buds. The combination of rich cocoa and sweet cherries creates a perfect harmony. Each scoop is a burst of flavor that dances on your palate. This ice cream is not only delicious but also visually stunning, with its deep red and dark brown swirls. It’s perfect for any occasion, whether you’re hosting a summer party or enjoying a quiet evening at home. Plus, it’s easy to make! With just a few simple ingredients, you can whip up this luxurious treat. So, why not treat yourself? Dive into the world of Scarlet Cocoa Serenade Ice Cream and discover a new favorite dessert!
Ingredients for Scarlet Cocoa Serenade Ice Cream
To create your own Scarlet Cocoa Serenade Ice Cream, you’ll need a handful of simple yet delightful ingredients. Each component plays a vital role in achieving that rich, creamy texture and the perfect balance of flavors. Here’s what you’ll need:
- 2 cups of fresh cherries, pitted and halved
- 1 cup of granulated sugar
- 1 cup of heavy cream
- 1 cup of whole milk
- ½ cup of unsweetened cocoa powder
- 1 teaspoon of vanilla extract
- Pinch of salt
These ingredients come together to create a luscious ice cream that’s both sweet and slightly tart. The cherries provide a vibrant color and a burst of flavor, while the cocoa adds a rich depth. You can easily find these ingredients at your local grocery store. Remember, using fresh cherries will enhance the taste, but if they’re out of season, frozen cherries work just as well!
Now that you have your ingredients ready, let’s move on to the next step: preparing this delightful treat!
Step-by-Step Preparation of Scarlet Cocoa Serenade Ice Cream
Step 1: Preparing the Cherry Mixture
First, let’s start with the cherry mixture. Take your fresh cherries and wash them thoroughly. After that, pit and halve them. This step is crucial because it allows the cherries to blend well into the ice cream. Next, place the halved cherries in a medium bowl. Sprinkle half a cup of granulated sugar over the cherries. This will help draw out their natural juices. Let the mixture sit for about 15 minutes. During this time, the cherries will become syrupy and sweet, creating a delicious base for your ice cream.
Step 2: Mixing the Cocoa Base
While the cherries are resting, it’s time to prepare the cocoa base. In a separate bowl, combine 1 cup of heavy cream, 1 cup of whole milk, ½ cup of unsweetened cocoa powder, 1 teaspoon of vanilla extract, and a pinch of salt. Whisk these ingredients together until they are smooth and well combined. The cocoa powder should dissolve completely, creating a rich chocolate mixture. This base is what gives your ice cream its creamy texture and deep chocolate flavor. Make sure there are no lumps for the best results!
Step 3: Combining Cherry and Cocoa
Now comes the fun part! Once your cherry mixture has rested, pour it into the cocoa base. Gently fold the cherries into the chocolate mixture. Be careful not to overmix; you want to keep some of the cherry pieces intact for texture. The vibrant red of the cherries will swirl beautifully with the dark cocoa, creating a stunning visual effect. This combination is what makes Scarlet Cocoa Serenade Ice Cream so special. It’s a feast for both the eyes and the taste buds!
Step 4: Churning the Ice Cream
Next, it’s time to churn your ice cream. If you have an ice cream maker, pour the combined mixture into the machine and churn according to the manufacturer’s instructions. This process usually takes about 20 to 30 minutes. If you don’t have an ice cream maker, don’t worry! You can still make this treat. Simply pour the mixture into a shallow dish and place it in the freezer. Stir it every 30 minutes for about 2 to 3 hours until it reaches a creamy consistency.
Step 5: Freezing the Ice Cream
Once your ice cream has been churned to a soft-serve consistency, transfer it to an airtight container. Smooth the top with a spatula and cover it tightly. Place the container in the freezer for at least 4 hours, or until the ice cream is firm. This final freezing step is essential for achieving that perfect scoopable texture. When you’re ready to serve, let the ice cream sit at room temperature for a few minutes to soften slightly. This will make scooping much easier!
Variations of Scarlet Cocoa Serenade Ice Cream
Adding Different Fruits
While the classic combination of cherries and cocoa is simply divine, you can easily switch things up by adding different fruits. For instance, raspberries or strawberries can bring a delightful twist to your ice cream. Their sweet and slightly tart flavors pair beautifully with chocolate. To use these fruits, follow the same steps as with the cherries. Just remember to adjust the sugar based on the sweetness of the fruit you choose. You can also mix fruits for a fun flavor explosion! Imagine a blend of cherries and raspberries swirling together in your ice cream. It’s a colorful and tasty treat that everyone will love!
Experimenting with Chocolate Types
Another exciting way to customize your Scarlet Cocoa Serenade Ice Cream is by experimenting with different types of chocolate. Instead of using unsweetened cocoa powder, try using dark chocolate or even milk chocolate for a sweeter flavor. You can melt the chocolate and mix it into the cream base for a richer taste. If you’re feeling adventurous, consider adding white chocolate chips or chunks for a creamy contrast. Each type of chocolate will give your ice cream a unique flavor profile, making it a fun experience to discover your favorite combination. So, don’t hesitate to get creative and make this recipe your own!
Cooking Note for Scarlet Cocoa Serenade Ice Cream
When making Scarlet Cocoa Serenade Ice Cream, a few cooking notes can help ensure your dessert turns out perfectly. First, always use high-quality ingredients. Fresh cherries and premium cocoa powder can significantly enhance the flavor of your ice cream. If possible, opt for organic cherries, as they tend to be sweeter and more flavorful.
Another important tip is to chill your mixing bowls and utensils before starting. This helps keep the cream cold, which is essential for achieving a smooth and creamy texture. You can place your bowls in the freezer for about 15 minutes before use. This small step can make a big difference in the final product!
Additionally, if you’re using an ice cream maker, make sure the bowl is completely frozen before pouring in the mixture. Most ice cream makers require the bowl to be frozen for at least 24 hours. This ensures that the ice cream churns properly and reaches the right consistency.
Lastly, don’t rush the freezing process. Allowing the ice cream to freeze for the recommended time is crucial for achieving that perfect scoopable texture. If you try to serve it too soon, it may be too soft and difficult to scoop. Patience is key when it comes to homemade ice cream!
Serving Suggestions for Scarlet Cocoa Serenade Ice Cream
Pairing with Toppings
When it comes to serving your Scarlet Cocoa Serenade Ice Cream, the right toppings can elevate your dessert to a whole new level. Consider adding a drizzle of chocolate syrup for an extra chocolatey kick. You can also sprinkle some crushed nuts, like almonds or hazelnuts, for a delightful crunch. Fresh whipped cream is another fantastic option; it adds a light and airy texture that complements the rich ice cream.
If you want to enhance the cherry flavor, try adding some cherry compote or fresh cherries on top. This not only looks beautiful but also adds a burst of freshness. For a fun twist, consider using colorful sprinkles or edible glitter to make your dessert visually appealing, especially for kids or festive occasions. The combination of flavors and textures will make each scoop a delightful experience!
Creative Serving Ideas
Serving your Scarlet Cocoa Serenade Ice Cream can be as creative as you want! Instead of traditional bowls, try using waffle cones or chocolate cups for a fun presentation. You can even layer the ice cream in a parfait glass with layers of crushed cookies or granola for added texture. This not only looks stunning but also makes for a delicious treat that’s perfect for sharing.
Another idea is to create ice cream sandwiches. Take two cookies of your choice and place a generous scoop of your Scarlet Cocoa Serenade Ice Cream in between. This makes for a delightful handheld dessert that’s perfect for summer gatherings. You can also freeze the sandwiches for a bit before serving, making them even more refreshing.
Lastly, consider serving your ice cream alongside a warm dessert, like a slice of chocolate cake or a brownie. The contrast between the warm and cold will create a delightful experience for your taste buds. No matter how you choose to serve it, your Scarlet Cocoa Serenade Ice Cream is sure to impress!
Tips for Perfecting Scarlet Cocoa Serenade Ice Cream
Choosing the Right Ingredients
To make the best Scarlet Cocoa Serenade Ice Cream, selecting high-quality ingredients is essential. Start with fresh cherries; they should be firm and vibrant in color. If you can, buy organic cherries for a sweeter taste. When it comes to cocoa powder, opt for unsweetened varieties that are rich in flavor. Brands like Valrhona or Ghirardelli are excellent choices. They provide a deep chocolate taste that enhances your ice cream.
For the cream and milk, choose full-fat options. Heavy cream gives your ice cream a rich, creamy texture, while whole milk adds a smoothness that’s hard to beat. If you prefer a lighter version, you can substitute some of the cream with half-and-half, but keep in mind that this may alter the final texture. Lastly, always use pure vanilla extract instead of imitation vanilla. The real deal adds a depth of flavor that elevates your dessert.
Storage Tips for Homemade Ice Cream
Storing your Scarlet Cocoa Serenade Ice Cream properly is key to maintaining its deliciousness. Once your ice cream is fully frozen, transfer it to an airtight container. This helps prevent ice crystals from forming, which can ruin the creamy texture. If you have a container with a tight-fitting lid, that’s even better!
When storing, place a piece of parchment paper directly on the surface of the ice cream before sealing the container. This extra layer helps keep air out and preserves the flavor. Homemade ice cream can last in the freezer for about 2 to 3 weeks, but for the best taste and texture, try to enjoy it within the first week.
When you’re ready to serve, take the ice cream out of the freezer and let it sit at room temperature for about 5 to 10 minutes. This will soften it slightly, making it easier to scoop. If you notice any ice crystals forming on the surface, simply stir the ice cream gently before serving. This will help restore its creamy consistency!
Breakdown of Time for Scarlet Cocoa Serenade Ice Cream
Prep Time
Preparing your Scarlet Cocoa Serenade Ice Cream is a breeze! The prep time for this delightful dessert is approximately 30 minutes. This includes washing, pitting, and halving the cherries, as well as mixing the cocoa base. It’s a fun and engaging process that allows you to get creative in the kitchen. So, gather your ingredients and get ready to whip up something special!
Cooking Time
Once your ingredients are prepped, the cooking time is minimal. The actual mixing and combining of the cherry and cocoa mixtures take about 10 minutes. If you’re using an ice cream maker, the churning process will take around 20 to 30 minutes. If you’re opting for the no-machine method, you’ll need to stir the mixture every 30 minutes for about 2 to 3 hours. This hands-on approach allows you to check the consistency and ensure it’s turning out perfectly!
Total Time
In total, you can expect to spend about 4 to 5 hours from start to finish, including the freezing time. After preparing and churning your ice cream, it needs to freeze for at least 4 hours to achieve that perfect scoopable texture. While this may seem like a long wait, the anticipation makes the first bite even more rewarding. So, plan ahead and enjoy the process of creating this delicious treat!
Nutritional Information for Scarlet Cocoa Serenade Ice Cream
Calories
When indulging in a scoop of Scarlet Cocoa Serenade Ice Cream, it’s good to know what you’re enjoying. Each serving, which is about half a cup, contains approximately 200 calories. This makes it a delightful treat that can fit into your dessert plans without overwhelming your daily calorie intake. Remember, moderation is key! Enjoying this ice cream as an occasional treat can be a part of a balanced diet.
Protein
In addition to its delicious flavor, this ice cream also provides a bit of protein. Each serving contains around 3 grams of protein. This comes mainly from the heavy cream and whole milk used in the recipe. While it’s not a significant source of protein, every little bit helps, especially when you’re enjoying a sweet treat. Pairing it with a protein-rich snack can make for a more balanced dessert experience!
Sodium
For those watching their sodium intake, you’ll be pleased to know that each serving of Scarlet Cocoa Serenade Ice Cream contains about 50 milligrams of sodium. This is relatively low, making it a guilt-free dessert option. It’s always a good idea to be mindful of sodium levels, especially if you have dietary restrictions. Enjoy this ice cream knowing it won’t add too much sodium to your day!
FAQs about Scarlet Cocoa Serenade Ice Cream
Can I use frozen cherries for this recipe?
Absolutely! Frozen cherries can be a great alternative if fresh ones are not available. Just make sure to thaw them before use. This will help release their juices, making it easier to create that delicious cherry mixture. Keep in mind that frozen cherries may be slightly softer than fresh ones, but they will still provide that lovely flavor and color to your ice cream.
How long can I store Scarlet Cocoa Serenade Ice Cream?
You can store your Scarlet Cocoa Serenade Ice Cream in the freezer for about 2 to 3 weeks. However, for the best taste and texture, it’s recommended to enjoy it within the first week. To keep it fresh, make sure to store it in an airtight container. This will help prevent ice crystals from forming and maintain that creamy consistency you love!
Can I make this ice cream without an ice cream maker?
Yes, you can definitely make Scarlet Cocoa Serenade Ice Cream without an ice cream maker! Simply pour the combined mixture into a shallow dish and place it in the freezer. Stir the mixture every 30 minutes for about 2 to 3 hours. This will help break up any ice crystals and create a smooth, creamy texture. It may take a little longer, but the results will be just as delicious!
What are some alternative sweeteners I can use?
If you’re looking for alternative sweeteners, there are several options you can try. Honey, maple syrup, or agave nectar can be great substitutes for granulated sugar. Just remember to adjust the quantity based on the sweetness level of the alternative you choose. For a low-calorie option, consider using stevia or erythritol. These sweeteners can provide the sweetness you desire without the extra calories. Experiment to find the perfect balance for your taste!
Conclusion: Enjoying Your Scarlet Cocoa Serenade Ice Cream Experience
As you take the final scoop of your homemade Scarlet Cocoa Serenade Ice Cream, you’ll realize that this dessert is more than just a sweet treat; it’s a celebration of flavors and creativity. The rich chocolate mingles beautifully with the tart cherries, creating a delightful experience that’s hard to resist. Whether you’re enjoying it on a hot summer day or as a cozy dessert on a chilly evening, each bite is a reminder of the joy that comes from making something special.
Sharing this ice cream with family and friends can turn any gathering into a memorable occasion. Imagine the smiles on their faces as they savor the unique combination of cherry and cocoa. You can even make it a fun activity by inviting them to help with the preparation. The laughter and chatter in the kitchen will add to the sweetness of the experience.
Remember, the beauty of homemade ice cream lies in its versatility. Feel free to experiment with different fruits and chocolate types, as suggested earlier. Each variation can lead to new favorites, making your ice cream adventures endless. So, don’t hesitate to get creative and make this recipe your own!
In conclusion, the Scarlet Cocoa Serenade Ice Cream is not just a dessert; it’s an experience filled with joy, creativity, and deliciousness. So, gather your ingredients, invite your loved ones, and embark on this delightful journey of making and enjoying your very own ice cream. You won’t regret it!
Indulge your sweet tooth with these decadent cocoa-infused delights:
- Divine Cocoa Serenade Cake: A Chocolate Delight
- Crimson Cocoa Rhapsody Ice Cream: A Must-Try Frozen Treat
- Scarlet Serenade Dream Cake: A Must-Try Dessert
For more sweet recipes and culinary inspiration, follow us on Pinterest!