Introduction to the Irresistible Oreo Dump Cake Recipe
Are you ready to dive into a world of chocolatey goodness? The Irresistible Oreo Dump Cake Recipe is here to satisfy your cravings! This delightful dessert combines the classic flavors of Oreo cookies with a rich chocolate cake mix. It’s a simple yet indulgent treat that everyone will love. Whether you’re a baking novice or a seasoned pro, this recipe is easy to follow and guarantees a delicious outcome.
What Makes the Irresistible Oreo Dump Cake Recipe Special?
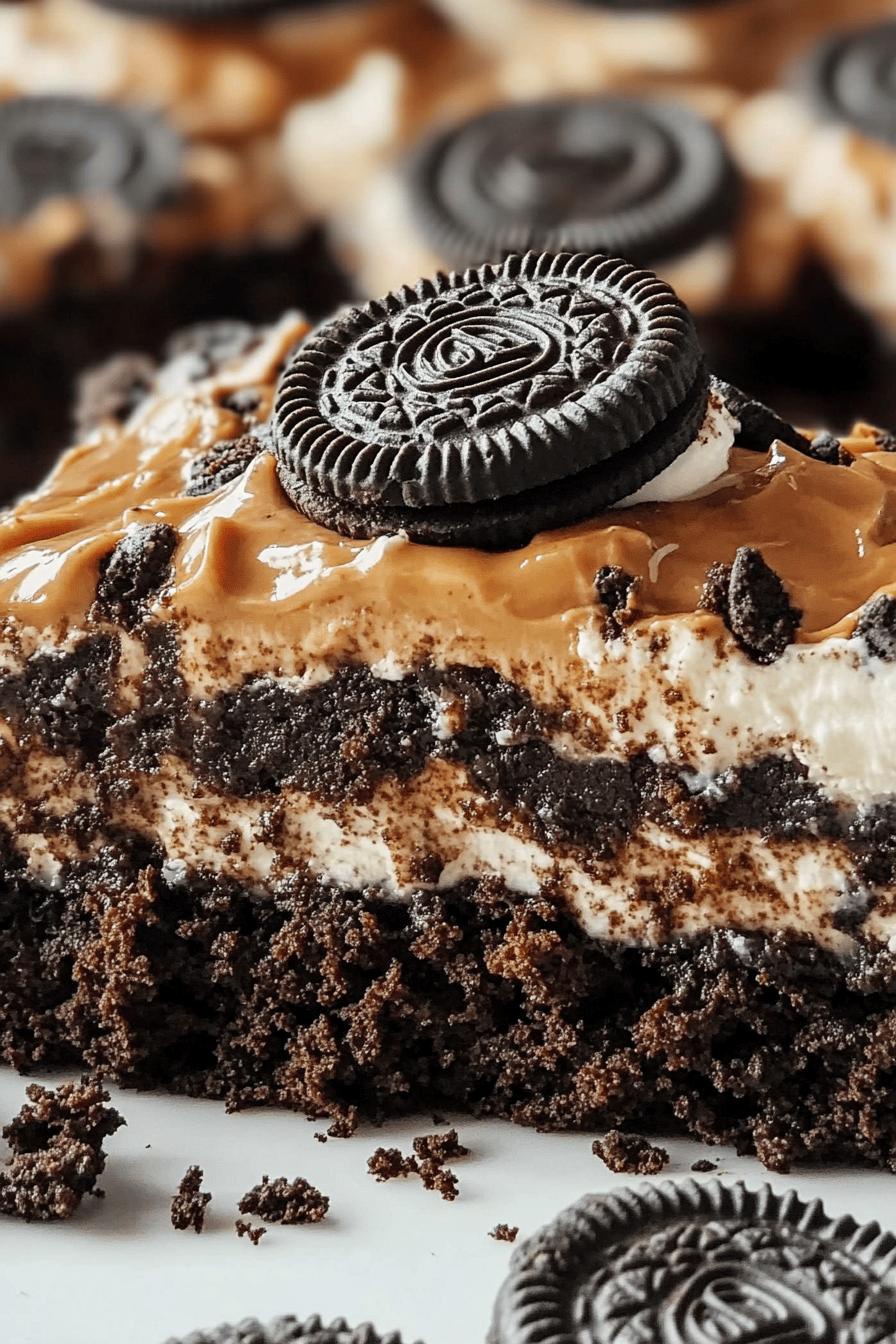
What sets this dump cake apart? First, it’s all about the layers! The crunchy Oreo cookies create a delightful texture that contrasts beautifully with the soft, moist chocolate cake. Plus, the melted butter drizzled on top adds a rich flavor that makes every bite heavenly. This dessert is not just about taste; it’s also about the experience. The aroma of baking chocolate fills your kitchen, making it hard to resist sneaking a taste before it’s even done!
The Perfect Dessert for Any Occasion
Whether you’re celebrating a birthday, hosting a potluck, or just treating yourself, this Oreo dump cake is the perfect choice. It’s quick to prepare, and you can easily serve a crowd. Imagine the smiles on your friends’ and family’s faces when they take their first bite! This dessert is versatile, too. You can dress it up with ice cream or fresh berries, or enjoy it on its own. No matter how you serve it, the Irresistible Oreo Dump Cake Recipe is sure to impress.
Ingredients for the Irresistible Oreo Dump Cake Recipe
To create the Irresistible Oreo Dump Cake Recipe, you’ll need a few simple ingredients. This recipe is not only easy to make but also requires items that you might already have in your pantry. Here’s what you’ll need:
- 1 package of chocolate cake mix (15.25 oz)
- 1 package of Oreo cookies (family size, about 14.3 oz)
- 1/2 cup of unsalted butter (1 stick, melted)
- 2 cups of milk
- 1 cup of chocolate chips (optional, for extra chocolatey goodness)
- 1 teaspoon of vanilla extract (optional, for added flavor)
These ingredients come together to create a dessert that is both rich and satisfying. The chocolate cake mix serves as the base, while the Oreo cookies add a delightful crunch. The melted butter not only enhances the flavor but also helps to create that perfect, gooey texture. If you want to take it up a notch, consider adding chocolate chips for an extra layer of chocolatey goodness!
Now that you have your ingredients ready, you’re one step closer to making this delicious treat. Let’s move on to the preparation steps!
Step-by-Step Preparation of the Irresistible Oreo Dump Cake Recipe
Now that you have all your ingredients, it’s time to bring this Irresistible Oreo Dump Cake Recipe to life! Follow these simple steps to create a dessert that will wow your taste buds. Each step is easy to follow, making this a fun baking experience for everyone.
Step 1: Gather Your Ingredients
Before you start, make sure you have everything you need. Gather your chocolate cake mix, Oreo cookies, melted butter, milk, chocolate chips, and vanilla extract. Having all your ingredients ready will make the process smoother and more enjoyable. Plus, it’s always nice to have everything at your fingertips!
Step 2: Prepare the Baking Dish
Next, you’ll want to prepare your baking dish. Grab a 9×13 inch baking pan and lightly grease it with cooking spray or butter. This step is important to prevent the cake from sticking. A well-prepared dish ensures that your cake comes out easily and maintains its beautiful shape. Now, you’re ready for the fun part!
Step 3: Layer the Oreo Cookies
Start by crushing the Oreo cookies. You can do this by placing them in a zip-top bag and using a rolling pin or simply crushing them with your hands. Once crushed, spread the Oreo crumbs evenly across the bottom of your prepared baking dish. This layer will provide a delicious crunch and flavor that pairs perfectly with the chocolate cake.
Step 4: Add the Chocolate Cake Mix
Now it’s time to add the chocolate cake mix. Sprinkle the dry cake mix evenly over the layer of crushed Oreos. Make sure to cover the Oreos completely. This layer will bake into a rich, chocolatey cake that complements the crunchy cookies below. Don’t worry about mixing it; just let the oven do its magic!
Step 5: Drizzle with Melted Butter
Next, take your melted butter and drizzle it generously over the cake mix. This step is crucial as it helps to create that gooey texture we all love. The melted butter seeps into the cake mix, ensuring every bite is moist and flavorful. If you’re feeling extra indulgent, sprinkle some chocolate chips on top for an added treat!
Step 6: Bake to Perfection
Finally, it’s time to bake! Preheat your oven to 350°F (175°C) and place your baking dish in the oven. Bake for about 30-35 minutes, or until the top is golden brown and a toothpick inserted in the center comes out clean. The aroma of chocolate will fill your kitchen, making it hard to wait! Once baked, let it cool for a few minutes before serving. Enjoy your delicious creation!
Variations of the Irresistible Oreo Dump Cake Recipe
While the Irresistible Oreo Dump Cake Recipe is already a crowd-pleaser, there are many ways to switch things up! You can easily customize this dessert to suit your taste or dietary needs. Let’s explore some exciting variations that will keep your dessert game fresh and fun.
Different Flavor Combinations
Why stick to just chocolate when you can explore other flavors? Here are a few delicious combinations to try:
- Peanut Butter Oreo Dump Cake: Add a layer of peanut butter between the Oreo cookies and the cake mix. This will create a rich, nutty flavor that pairs perfectly with chocolate.
- Mint Chocolate Oreo Dump Cake: Use mint-flavored Oreo cookies instead of regular ones. The minty twist will give your cake a refreshing taste!
- White Chocolate Raspberry Oreo Dump Cake: Swap the chocolate cake mix for a white cake mix. Add fresh raspberries and white chocolate chips for a fruity and creamy delight.
These variations not only change the flavor but also add a fun twist to the classic recipe. Feel free to experiment with your favorite flavors and see what delicious combinations you can create!
Gluten-Free Options
If you or someone you know is gluten-sensitive, you can still enjoy this delightful dessert! Here’s how to make a gluten-free version of the Irresistible Oreo Dump Cake Recipe:
- Use gluten-free chocolate cake mix. Many brands offer delicious gluten-free options that taste just as good as regular mixes.
- Choose gluten-free Oreo cookies. There are several brands that make gluten-free cookies, so you won’t miss out on that classic Oreo flavor.
By making these simple substitutions, you can create a gluten-free Oreo dump cake that everyone can enjoy. It’s a great way to include everyone in the fun of dessert!
Cooking Note for the Irresistible Oreo Dump Cake Recipe
When it comes to baking, a few tips can make a big difference. The Irresistible Oreo Dump Cake Recipe is no exception! Here are some important cooking notes to ensure your cake turns out perfectly every time.
First, always check the expiration date on your cake mix. Using fresh ingredients is key to achieving the best flavor and texture. If your cake mix is old, it may not rise properly, leading to a dense cake.
Next, be mindful of your oven temperature. Ovens can vary, so it’s a good idea to use an oven thermometer. This ensures that your cake bakes evenly. If your oven runs hot, you might need to reduce the baking time slightly. Conversely, if it runs cool, you may need to add a few extra minutes.
Another tip is to let the cake cool for a bit before serving. This allows the flavors to meld together and makes it easier to cut into squares. If you can resist the temptation, waiting for about 10-15 minutes will enhance the overall experience.
Lastly, feel free to get creative with toppings! While the cake is delicious on its own, adding whipped cream, chocolate sauce, or even crushed Oreos on top can elevate your dessert to a whole new level. Enjoy experimenting with different toppings to find your favorite combination!
Serving Suggestions for the Irresistible Oreo Dump Cake Recipe
Now that you’ve baked the Irresistible Oreo Dump Cake Recipe, it’s time to think about how to serve it! This dessert is delicious on its own, but pairing it with other treats can take it to the next level. Here are some delightful serving suggestions that will make your cake even more enjoyable.
Pairing with Ice Cream
One of the best ways to enjoy your Oreo dump cake is by serving it with a scoop of ice cream. The cold, creamy texture of ice cream contrasts beautifully with the warm, gooey cake. Here are some great ice cream flavors to consider:
- Vanilla: A classic choice that complements the rich chocolate flavor.
- Cookies and Cream: For an extra Oreo kick, this flavor is a perfect match!
- Mint Chocolate Chip: This refreshing flavor adds a fun twist to your dessert.
Simply place a warm slice of the dump cake on a plate and top it with a generous scoop of your chosen ice cream. Drizzle some chocolate syrup or caramel sauce on top for an extra treat. Your guests will love this indulgent combination!
Serving with Fresh Berries
If you’re looking for a lighter option, consider serving your Oreo dump cake with fresh berries. The tartness of the berries balances the sweetness of the cake perfectly. Here are some berry options to try:
- Strawberries: Sliced strawberries add a sweet and juicy touch.
- Raspberries: Their tangy flavor pairs wonderfully with chocolate.
- Blueberries: These little gems add a burst of flavor and color.
To serve, simply place a slice of the dump cake on a plate and scatter fresh berries around it. You can also add a dollop of whipped cream for a beautiful presentation. This combination not only looks stunning but also adds a refreshing element to your dessert.
With these serving suggestions, your Irresistible Oreo Dump Cake Recipe will be a hit at any gathering. Whether you choose to pair it with ice cream or fresh berries, you’re sure to impress your friends and family with this delightful treat!
Tips for Making the Irresistible Oreo Dump Cake Recipe
To ensure your Irresistible Oreo Dump Cake Recipe turns out perfectly every time, here are some helpful tips. These suggestions will help you store, reheat, and enjoy your delicious creation to the fullest!
Storage Tips
After you’ve baked your Oreo dump cake, you might have some leftovers. Here’s how to store them properly:
- Cool Completely: Before storing, let the cake cool completely at room temperature. This prevents condensation from forming, which can make the cake soggy.
- Cover Tightly: Use plastic wrap or aluminum foil to cover the cake. This keeps it fresh and prevents it from drying out.
- Refrigerate: Store the covered cake in the refrigerator if you plan to keep it for more than a day. It can last up to 4-5 days in the fridge.
- Freeze for Longer Storage: If you want to keep it longer, consider freezing it. Cut the cake into individual portions, wrap them tightly, and place them in a freezer-safe container. It can last up to 3 months in the freezer.
When you’re ready to enjoy your leftovers, simply follow the reheating instructions below!
Reheating Instructions
Reheating your Irresistible Oreo Dump Cake Recipe is easy and will bring back that warm, gooey goodness. Here’s how to do it:
- Microwave: For a quick option, place a slice of cake on a microwave-safe plate. Heat it in the microwave for about 20-30 seconds, or until warm. Be careful not to overheat, as it can become dry.
- Oven: If you prefer a more even heating, preheat your oven to 350°F (175°C). Place the cake in an oven-safe dish and cover it with aluminum foil. Heat for about 10-15 minutes, or until warmed through.
Once reheated, consider adding a scoop of ice cream or fresh berries to enhance the experience. Enjoy your delicious dessert all over again!
Breakdown of Time for the Irresistible Oreo Dump Cake Recipe
Understanding the time needed for the Irresistible Oreo Dump Cake Recipe is essential for planning your baking session. Here’s a quick breakdown of the time you’ll need for each step, so you can enjoy this delicious dessert without any surprises!
Prep Time
The prep time for this delightful cake is quite short. You’ll need about 15-20 minutes to gather your ingredients, prepare the baking dish, and layer the Oreo cookies and cake mix. This quick prep time makes it easy to whip up this dessert even on a busy day!
Cooking Time
Once you’ve prepped everything, the cooking time is approximately 30-35 minutes. During this time, your cake will bake to perfection, filling your kitchen with a mouthwatering aroma. Keep an eye on it, and remember to check for doneness with a toothpick!
Total Time
In total, you’re looking at about 45-55 minutes from start to finish. This includes both the prep and cooking times. With such a quick turnaround, you can have a delicious dessert ready in no time. Perfect for unexpected guests or a sweet craving!
Now that you know the time breakdown, you can easily fit this Irresistible Oreo Dump Cake Recipe into your schedule. Happy baking!
Nutritional Information for the Irresistible Oreo Dump Cake Recipe
Understanding the nutritional information of the Irresistible Oreo Dump Cake Recipe can help you enjoy this dessert while keeping your dietary goals in mind. Here’s a breakdown of the calories and macronutrients, along with some health considerations to keep in mind.
Calories and Macronutrients
Each serving of the Irresistible Oreo Dump Cake Recipe is packed with flavor, but it also comes with a calorie count. Here’s an approximate nutritional breakdown for one slice (based on 12 servings):
- Calories: 350
- Fat: 18g
- Saturated Fat: 10g
- Carbohydrates: 45g
- Fiber: 2g
- Sugar: 25g
- Protein: 4g
These values can vary based on the specific ingredients you use, such as the type of cake mix or whether you add chocolate chips. Always check the labels for the most accurate information. While this dessert is indulgent, it can be enjoyed in moderation as part of a balanced diet.
Health Considerations
When enjoying the Irresistible Oreo Dump Cake Recipe, it’s important to consider a few health factors:
- Moderation is Key: This cake is rich and sweet, so enjoying it in moderation is essential. A small slice can satisfy your sweet tooth without overindulging.
- Allergies: Be mindful of any allergies, especially to gluten or dairy. You can easily make gluten-free and dairy-free versions of this cake to accommodate dietary restrictions.
- Balance with Nutrition: Pairing this dessert with fresh fruits or a protein source can help balance your meal. For example, serving it with berries or a scoop of yogurt can add nutrients and fiber.
By keeping these considerations in mind, you can enjoy the Irresistible Oreo Dump Cake Recipe while still being mindful of your health. Treat yourself to this delightful dessert and savor every bite!
FAQs about the Irresistible Oreo Dump Cake Recipe
Can I make the Irresistible Oreo Dump Cake Recipe ahead of time?
Absolutely! The Irresistible Oreo Dump Cake Recipe is perfect for making ahead of time. You can prepare the cake and store it in the refrigerator for up to 2 days before serving. Just make sure to cover it tightly with plastic wrap or aluminum foil to keep it fresh. If you want to make it even earlier, consider baking it and then freezing it. Just follow the storage tips mentioned earlier. When you’re ready to serve, simply thaw it in the fridge overnight and reheat as needed!
What can I substitute for the chocolate cake mix?
If you want to switch things up, there are several great substitutes for the chocolate cake mix in the Irresistible Oreo Dump Cake Recipe. Here are a few ideas:
- Vanilla Cake Mix: For a lighter flavor, use a vanilla cake mix. This will create a delicious contrast with the Oreo cookies.
- Red Velvet Cake Mix: For a fun twist, try red velvet cake mix. It adds a unique flavor and a beautiful color to your dessert.
- Gluten-Free Cake Mix: If you need a gluten-free option, many brands offer gluten-free chocolate or vanilla cake mixes that work perfectly.
Feel free to experiment with different flavors to find your favorite combination!
How do I store leftovers of the Irresistible Oreo Dump Cake Recipe?
Storing leftovers of the Irresistible Oreo Dump Cake Recipe is simple! Here’s how to do it:
- Cool Completely: Allow the cake to cool completely at room temperature before storing. This helps prevent sogginess.
- Cover Tightly: Use plastic wrap or aluminum foil to cover the cake. This keeps it fresh and prevents it from drying out.
- Refrigerate: Store the covered cake in the refrigerator for up to 4-5 days. It’s best enjoyed within this time frame for optimal taste and texture.
- Freeze for Longer Storage: If you want to keep it longer, cut the cake into individual portions, wrap them tightly, and place them in a freezer-safe container. It can last up to 3 months in the freezer.
When you’re ready to enjoy your leftovers, simply follow the reheating instructions provided earlier. Enjoy your delicious dessert again!
Conclusion: Indulge in the Irresistible Oreo Dump Cake Recipe Today!
In conclusion, the Irresistible Oreo Dump Cake Recipe is a delightful treat that brings joy to any occasion. With its layers of crunchy Oreo cookies and rich chocolate cake, this dessert is sure to satisfy your sweet cravings. Whether you’re celebrating a special event or simply enjoying a cozy night in, this cake is the perfect choice.
Not only is it easy to make, but it also allows for endless variations. You can customize it to suit your taste or dietary needs, making it a versatile dessert for everyone. From peanut butter to mint chocolate, the possibilities are endless!
So why wait? Gather your ingredients and start baking today! Your friends and family will be amazed by this delicious creation. Remember, every slice is a moment of indulgence, and you deserve to treat yourself. Enjoy the heavenly flavors of the Irresistible Oreo Dump Cake Recipe and make sweet memories with every bite!
Indulge your taste buds with more cheesy and delightful recipes like these:
- Irresistible Cheese Bread Recipe for Cheesy Delight
- Irresistible Red Velvet Cake Roll: A Must-Try Dessert
- Irresistible Lemon Blueberry Cheesecake: Simply Divine
For more mouthwatering recipes and culinary inspiration, follow us on Pinterest!