Introduction to Honey Butter Fried Chicken Tenders
Are you ready to take your taste buds on a delightful journey? Honey butter fried chicken tenders are not just any ordinary dish; they are a celebration of flavors! Imagine tender chicken, marinated to perfection, coated in a crispy, golden crust, and drizzled with a sweet honey butter glaze. This dish is a perfect blend of savory and sweet, making it a favorite for many.
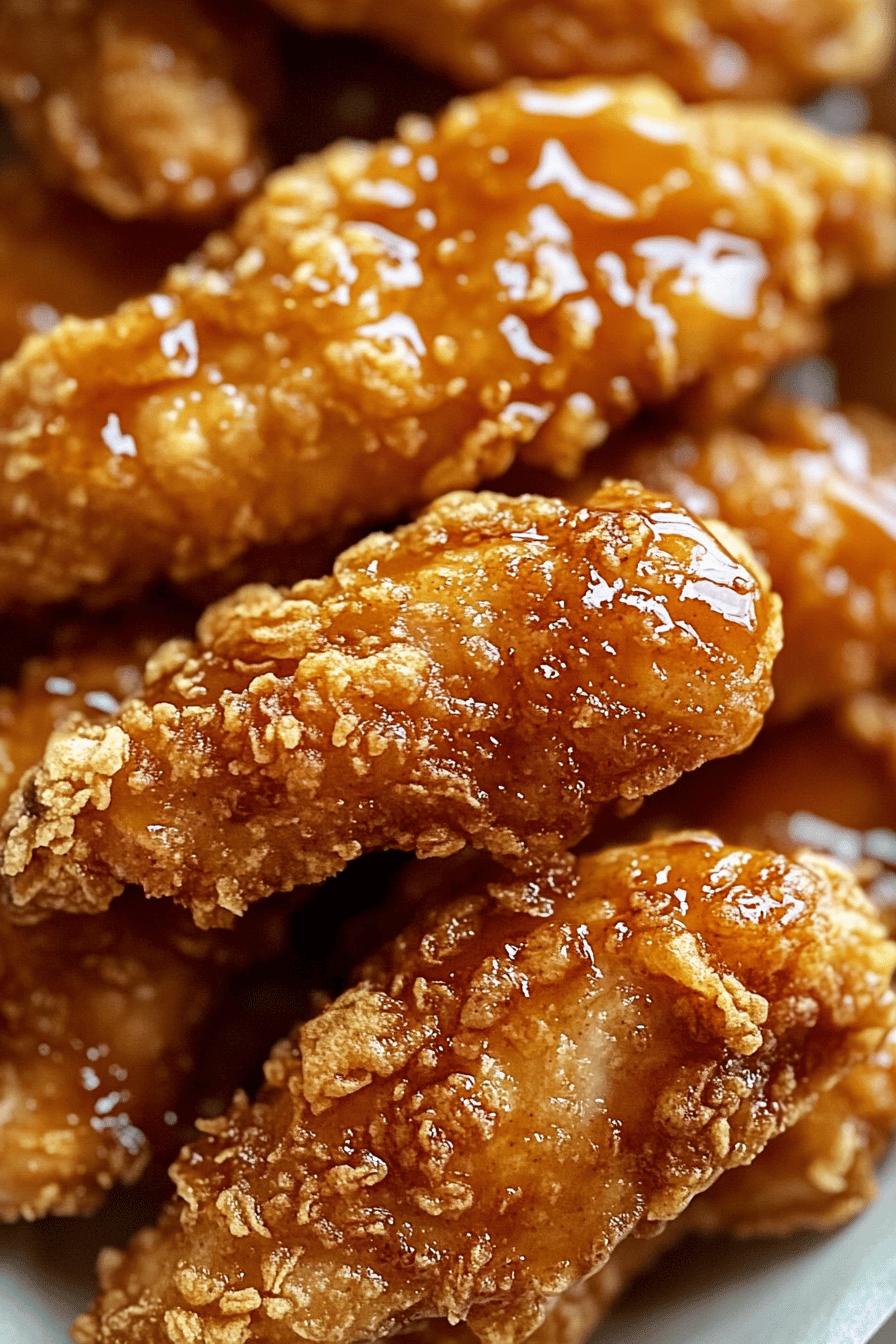
What Makes Honey Butter Fried Chicken Tenders Special?
What sets honey butter fried chicken tenders apart from other fried chicken recipes? First, the marination process. The chicken is soaked in buttermilk, which makes it incredibly juicy and tender. This step is crucial as it infuses the meat with flavor and moisture.
Next, the coating! A mix of flour and spices creates a crunchy exterior that contrasts beautifully with the soft chicken inside. The real magic happens when you drizzle the honey butter glaze over the hot tenders. This glaze adds a rich sweetness that perfectly complements the savory notes of the fried chicken.
Moreover, these tenders are versatile. They can be served as a main dish for dinner or as a fun appetizer at parties. Whether you’re hosting a gathering or enjoying a cozy night in, honey butter fried chicken tenders are sure to impress. Plus, they are easy to make, making them a go-to recipe for busy weeknights.
In the following sections, we will dive into the ingredients, preparation steps, and tips to ensure your honey butter fried chicken tenders turn out perfectly every time. Get ready to enjoy a dish that will have everyone asking for seconds!
Ingredients for Honey Butter Fried Chicken Tenders
To create the mouthwatering honey butter fried chicken tenders, you’ll need a few simple ingredients. Each component plays a vital role in achieving that perfect balance of flavor and texture. Here’s what you’ll need:
- Chicken Tenders: 1 pound of fresh chicken tenders. These are the star of the dish!
- Buttermilk: 1 cup. This will help tenderize the chicken and add moisture.
- Spices for Marination: 1 teaspoon of salt, 1 teaspoon of black pepper, and 1 teaspoon of garlic powder. These spices enhance the chicken’s flavor.
- All-Purpose Flour: 1 cup. This is essential for the crispy coating.
- Seasoning for Coating: 1 teaspoon of paprika, 1 teaspoon of onion powder, and a pinch of cayenne pepper for a little kick.
- Vegetable Oil: For frying. You’ll need enough to fill your frying pan about 1 inch deep.
- Honey: ½ cup. This will be used in the glaze, adding sweetness.
- Butter: ¼ cup (half a stick). This will give the glaze a rich, buttery flavor.
Gathering these ingredients is the first step toward creating your delicious honey butter fried chicken tenders. Each item contributes to the overall taste and texture, ensuring that every bite is a delightful experience. Now that you have everything you need, let’s move on to the preparation steps!
Step-by-Step Preparation of Honey Butter Fried Chicken Tenders
Now that you have all your ingredients ready, it’s time to dive into the preparation of your honey butter fried chicken tenders. Follow these simple steps to create a dish that’s crispy, juicy, and bursting with flavor!
Step 1: Marinating the Chicken
Start by marinating the chicken tenders. In a large bowl, combine the buttermilk, salt, black pepper, and garlic powder. Mix well to ensure the spices are evenly distributed. Then, add the chicken tenders to the bowl, making sure they are fully submerged in the buttermilk mixture. Cover the bowl with plastic wrap and refrigerate for at least 1 hour, or up to overnight. This marination process is key to achieving tender and flavorful chicken.
Step 2: Preparing the Coating
While the chicken is marinating, it’s time to prepare the coating. In a separate shallow dish, combine the all-purpose flour, paprika, onion powder, and cayenne pepper. Mix these dry ingredients thoroughly. This flavorful coating will give your chicken tenders that irresistible crunch. Set this dish aside until the chicken is ready to be coated.
Step 3: Frying the Chicken Tenders
Once the chicken has marinated, it’s time to fry! Heat vegetable oil in a large frying pan over medium-high heat. You want the oil to be about 1 inch deep. While the oil is heating, remove the chicken tenders from the buttermilk mixture, allowing any excess liquid to drip off. Then, dredge each tender in the flour mixture, ensuring they are well-coated. Shake off any excess flour before placing them in the hot oil.
Fry the chicken tenders in batches, being careful not to overcrowd the pan. Cook each side for about 4-5 minutes, or until they are golden brown and cooked through. Use a meat thermometer to check that the internal temperature reaches 165°F (75°C). Once cooked, transfer the tenders to a plate lined with paper towels to drain any excess oil.
Step 4: Making the Honey Butter Glaze
While the chicken is frying, you can prepare the honey butter glaze. In a small saucepan, melt the butter over low heat. Once melted, add the honey and stir until well combined. Allow the mixture to simmer for a minute or two, letting the flavors meld together. This glaze will add a sweet and buttery finish to your chicken tenders.
Step 5: Drizzling the Glaze
After frying all the chicken tenders, it’s time to drizzle on that delicious honey butter glaze. Place the hot chicken tenders on a serving platter and generously drizzle the glaze over them. You can also toss the tenders in the glaze for an even coating. Serve immediately while they are still warm, and watch as everyone enjoys this delightful dish!
Variations of Honey Butter Fried Chicken Tenders
While the classic honey butter fried chicken tenders are a hit on their own, there are exciting variations you can try! These twists will add new flavors and textures to your dish, making it even more enjoyable. Let’s explore two delicious options: spicy honey butter fried chicken tenders and baked honey butter chicken tenders.
Spicy Honey Butter Fried Chicken Tenders
If you love a little heat, then spicy honey butter fried chicken tenders are perfect for you! To make this variation, simply add some heat to your marinade and coating. Here’s how:
- Marinade: Add 1 teaspoon of hot sauce to the buttermilk mixture. This will infuse the chicken with a spicy kick.
- Coating: Mix in ½ teaspoon of cayenne pepper or chili powder into the flour mixture. This will give the coating an extra layer of flavor.
After frying, drizzle the honey butter glaze over the tenders as usual. The sweetness of the honey will balance the heat, creating a delightful contrast that will have your taste buds dancing!
Baked Honey Butter Chicken Tenders
For a healthier option, try baked honey butter chicken tenders. This method reduces the oil while still delivering that crispy texture. Here’s how to bake them:
- Preparation: Follow the marination and coating steps as usual.
- Baking: Preheat your oven to 400°F (200°C). Line a baking sheet with parchment paper. Place the coated chicken tenders on the sheet, making sure they are spaced apart.
- Cooking: Bake for 15-20 minutes, flipping halfway through, until they are golden brown and cooked through. Use a meat thermometer to ensure they reach 165°F (75°C).
Once baked, drizzle the honey butter glaze over the tenders. This variation is not only delicious but also a great way to enjoy your favorite dish with less guilt!
These variations of honey butter fried chicken tenders are sure to impress your family and friends. Whether you prefer a spicy kick or a healthier baked option, you can enjoy the same great flavors in different ways. Now, let’s move on to some cooking notes to ensure your tenders turn out perfectly every time!
Cooking Note for Honey Butter Fried Chicken Tenders
When it comes to cooking honey butter fried chicken tenders, a few key notes can help you achieve the best results. These tips will ensure that your tenders are not only delicious but also perfectly cooked every time.
First, pay attention to the temperature of the oil. It should be hot enough to fry the chicken but not so hot that it burns the coating. A good rule of thumb is to heat the oil to around 350°F (175°C). You can test the oil by dropping a small piece of bread into it; if it sizzles and turns golden brown in about 60 seconds, the oil is ready.
Next, avoid overcrowding the frying pan. Fry the chicken tenders in small batches to maintain the oil temperature. If you add too many tenders at once, the temperature will drop, resulting in soggy chicken instead of crispy tenders.
Also, remember to let the fried chicken tenders rest on a paper towel-lined plate after frying. This step helps absorb excess oil, keeping your tenders crispy and not greasy.
Lastly, for the best flavor, serve the honey butter fried chicken tenders immediately after drizzling with the glaze. The combination of warm chicken and sweet glaze creates a mouthwatering experience that’s hard to resist!
By following these cooking notes, you’ll be well on your way to creating the perfect honey butter fried chicken tenders that everyone will love. Now, let’s explore some serving suggestions to elevate your dish even further!
Serving Suggestions for Honey Butter Fried Chicken Tenders
Once you’ve prepared your delicious honey butter fried chicken tenders, it’s time to think about how to serve them. The right accompaniments can elevate your dish and create a memorable meal. Here are some fantastic serving suggestions to consider!
Pairing with Dipping Sauces
Dipping sauces can add an extra layer of flavor to your honey butter fried chicken tenders. Here are a few tasty options:
- Ranch Dressing: This classic sauce pairs perfectly with fried chicken. Its creamy texture and herby flavor complement the sweetness of the honey butter glaze.
- Honey Mustard: A mix of honey and mustard creates a tangy and sweet dip that enhances the chicken’s flavor.
- Buffalo Sauce: For those who enjoy a spicy kick, buffalo sauce is a great choice. The heat balances the sweetness of the glaze.
- Barbecue Sauce: A smoky barbecue sauce adds depth and richness, making it a popular choice for fried chicken.
Feel free to mix and match these sauces to find your favorite combination. Having a variety of dips will make your meal even more enjoyable for everyone!
Side Dishes to Complement the Tenders
To create a well-rounded meal, consider serving your honey butter fried chicken tenders with some delicious side dishes. Here are a few ideas:
- Coleslaw: A refreshing coleslaw adds crunch and a tangy flavor that pairs well with the rich chicken tenders.
- Mashed Potatoes: Creamy mashed potatoes are a comforting side that complements the crispy tenders beautifully.
- Macaroni and Cheese: This cheesy dish is a favorite among many and adds a delightful creaminess to your meal.
- Steamed Vegetables: For a healthier option, serve steamed broccoli or green beans. They add color and nutrition to your plate.
These side dishes not only enhance the meal but also provide a balance of flavors and textures. Whether you’re hosting a dinner party or enjoying a family meal, these suggestions will make your honey butter fried chicken tenders shine!
Tips for Perfect Honey Butter Fried Chicken Tenders
Creating the perfect honey butter fried chicken tenders is all about attention to detail. With a few helpful tips, you can ensure that your tenders are crispy, juicy, and bursting with flavor. Here are some essential tips to keep in mind:
- Choose Quality Chicken: Start with fresh, high-quality chicken tenders. Look for tenders that are plump and have a nice color. Fresh chicken will yield the best flavor and texture.
- Marinate Longer: For even more flavor, consider marinating the chicken for longer than one hour. If time allows, marinate overnight. This extra time allows the spices to penetrate deeper into the meat.
- Use a Meat Thermometer: To ensure your chicken is cooked perfectly, use a meat thermometer. The internal temperature should reach 165°F (75°C). This step prevents undercooking or overcooking your tenders.
- Double-Dip for Extra Crunch: For an extra crispy coating, try double-dipping your chicken tenders. After the first coating of flour, dip them back into the buttermilk and then coat them again in the flour mixture.
- Let the Coated Chicken Rest: After coating the chicken, let it rest for about 10 minutes before frying. This helps the coating adhere better during cooking, resulting in a crunchier texture.
- Maintain Oil Temperature: Keep an eye on the oil temperature while frying. If it gets too hot, the coating may burn. If it’s too cool, the chicken will absorb more oil and become greasy. Adjust the heat as needed.
- Serve Immediately: For the best experience, serve the chicken tenders right after drizzling with the honey butter glaze. This ensures they stay warm and crispy, making every bite delightful.
By following these tips, you’ll be well on your way to mastering the art of honey butter fried chicken tenders. Each step contributes to the overall success of the dish, ensuring that your tenders are a hit at any meal!
Breakdown of Time for Honey Butter Fried Chicken Tenders
Understanding the time needed to prepare honey butter fried chicken tenders is essential for planning your meal. Here’s a simple breakdown of the time involved in each step, so you can manage your cooking efficiently and enjoy this delicious dish without any stress!
Prep Time
The prep time for honey butter fried chicken tenders is approximately 15 minutes. This includes gathering your ingredients, marinating the chicken, and preparing the coating. While the chicken is marinating, you can use this time to set up your cooking area and get everything ready for frying. Remember, marinating the chicken for at least one hour is crucial for flavor, so plan accordingly!
Cooking Time
Once the chicken is marinated, the cooking time will take about 20-25 minutes. This includes frying the chicken tenders in batches until they are golden brown and cooked through. Each batch will take around 4-5 minutes per side. While the chicken is frying, you can also prepare the honey butter glaze, which only takes a few minutes to make. This multitasking will help you save time!
Total Time
In total, you should expect to spend about 1 hour and 40 minutes from start to finish. This includes the marination time, prep time, and cooking time. While it may seem like a bit of a commitment, the end result is well worth it! You’ll have a plate of crispy, juicy honey butter fried chicken tenders that everyone will love.
By breaking down the time needed for each step, you can better plan your cooking process. This way, you can enjoy the delightful experience of making and sharing these tasty chicken tenders with family and friends!
Nutritional Information for Honey Butter Fried Chicken Tenders
When enjoying honey butter fried chicken tenders, it’s important to be aware of their nutritional content. This information can help you make informed choices about your meals. Below, we break down the key nutritional components of this delicious dish.
Calories
Each serving of honey butter fried chicken tenders contains approximately 400-450 calories. This number can vary based on the size of the chicken tenders and the amount of honey butter glaze used. While they are a tasty treat, it’s good to enjoy them in moderation, especially if you’re watching your calorie intake.
Protein
One of the great benefits of chicken tenders is their protein content. Each serving provides around 25-30 grams of protein. Protein is essential for building and repairing tissues, making it an important part of a balanced diet. Enjoying these tenders can help you meet your daily protein needs while satisfying your taste buds!
Sodium
Honey butter fried chicken tenders contain approximately 800-900 milligrams of sodium per serving. This amount can vary depending on the seasoning used in the marinade and the coating. If you’re watching your sodium intake, consider adjusting the amount of salt in the recipe or pairing the tenders with low-sodium dipping sauces.
By keeping these nutritional facts in mind, you can enjoy your honey butter fried chicken tenders while being mindful of your dietary goals. They are a delicious option for a meal or snack, providing a good balance of protein and flavor!
FAQs about Honey Butter Fried Chicken Tenders
Can I use chicken breasts instead of tenders?
Absolutely! You can use chicken breasts if you prefer. Just make sure to cut them into strips that are similar in size to chicken tenders. This will help them cook evenly. Keep in mind that chicken breasts may take a little longer to cook, so check the internal temperature to ensure they reach 165°F (75°C).
How do I store leftover honey butter fried chicken tenders?
Storing leftover honey butter fried chicken tenders is easy! Allow them to cool completely, then place them in an airtight container. You can keep them in the refrigerator for up to 3 days. To reheat, place them in an oven at 350°F (175°C) for about 10-15 minutes. This will help restore their crispy texture!
Can I make the honey butter glaze in advance?
Yes, you can make the honey butter glaze in advance! Simply prepare the glaze and store it in an airtight container in the refrigerator. When you’re ready to use it, just reheat it gently on the stove or in the microwave until it’s warm. This way, you can save time when preparing your chicken tenders!
Conclusion on Honey Butter Fried Chicken Tenders
In conclusion, honey butter fried chicken tenders are a delightful dish that brings together the best of both worlds: crispy, savory chicken and a sweet, buttery glaze. This recipe is not only easy to follow but also allows for creativity with variations and serving options. Whether you’re preparing a quick weeknight dinner or hosting a gathering, these tenders are sure to impress your family and friends.
By marinating the chicken in buttermilk, you ensure that each bite is juicy and flavorful. The crispy coating adds a satisfying crunch, while the honey butter glaze elevates the dish to a whole new level of deliciousness. Plus, with the tips and serving suggestions provided, you can customize your meal to suit any occasion.
So, gather your ingredients, roll up your sleeves, and get ready to enjoy the mouthwatering experience of honey butter fried chicken tenders. With their irresistible taste and easy preparation, this dish is bound to become a favorite in your household. Happy cooking!
Relevant Recipes Link: