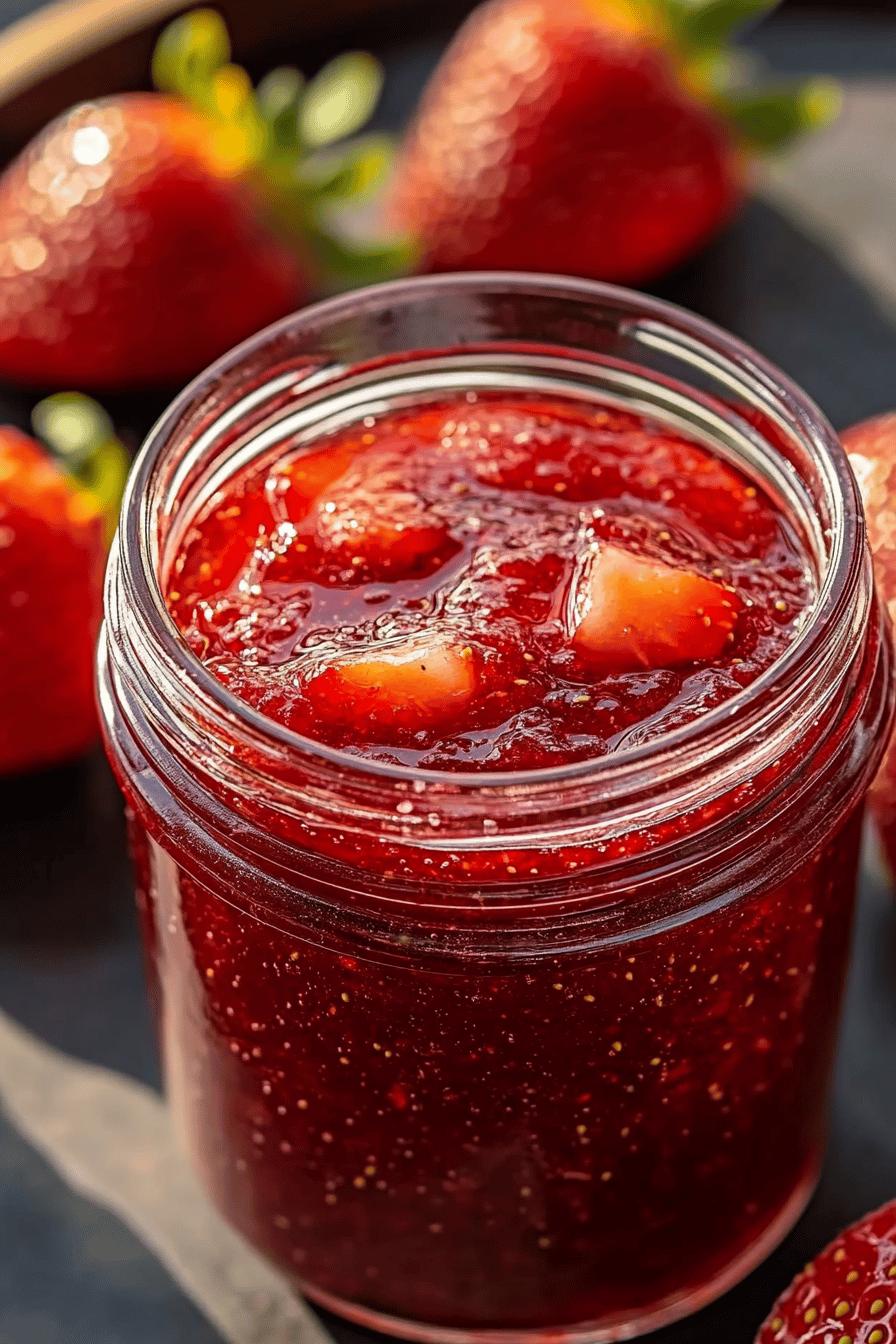
Introduction to Homemade Strawberry Jam
The Joy of Making Homemade Strawberry Jam
There’s something truly special about making your own food. When it comes to homemade strawberry jam, the joy multiplies! Imagine the sweet aroma of fresh strawberries filling your kitchen. It’s a delightful experience that brings back memories of summer days and family gatherings. Making jam is not just about preserving fruit; it’s about creating something delicious with your own hands.
Homemade strawberry jam is a treat that can brighten up any meal. Whether you’re spreading it on warm toast or adding it to your favorite dessert, the taste is simply unbeatable. Plus, you can control the ingredients, ensuring that your jam is as healthy as it is tasty. With just a few simple ingredients, you can whip up a batch that’s bursting with flavor.
Moreover, making jam can be a fun activity to share with family or friends. It’s a great way to bond while enjoying the process of cooking together. You can even involve kids in the preparation, teaching them about fruits and cooking. The smiles on their faces when they taste the finished product are priceless!
So, roll up your sleeves and get ready to dive into the world of homemade strawberry jam. It’s easy, fun, and oh-so-rewarding. Let’s explore the ingredients you’ll need to get started on this sweet adventure!
Ingredients for Homemade Strawberry Jam
To create your own delightful batch of homemade strawberry jam, you’ll need just a few simple ingredients. Each one plays a vital role in bringing out the natural sweetness of the strawberries while ensuring the perfect texture. Here’s what you’ll need:
- Fresh Strawberries: About 2 pounds of ripe strawberries. Look for bright red berries that are firm and fragrant.
- Sugar: 4 cups of granulated sugar. This helps to sweeten the jam and acts as a preservative.
- Lemon Juice: 1/4 cup of freshly squeezed lemon juice. This adds a zesty flavor and helps balance the sweetness.
- Pectin: 1 package of fruit pectin (optional). This can help your jam set better, but it’s not always necessary if you prefer a softer jam.
These ingredients are easy to find at your local grocery store. Fresh strawberries are the star of the show, so make sure to choose the best quality. The sugar and lemon juice will enhance the flavor, while pectin can help achieve that perfect jam consistency.
Now that you have your ingredients ready, it’s time to move on to the preparation steps. Let’s get cooking and turn those strawberries into a delicious homemade jam!
Step-by-Step Preparation of Homemade Strawberry Jam
Step 1: Preparing the Strawberries
First things first, let’s get those strawberries ready! Start by washing them thoroughly under cool running water. This helps remove any dirt or pesticides. After washing, gently pat them dry with a clean towel.
Next, remove the green tops, also known as the hulls. You can do this by using a small knife or a hulling tool. Once the tops are off, slice the strawberries into halves or quarters, depending on your preference. Smaller pieces will cook down faster, while larger chunks will give your jam a chunkier texture. Place the prepared strawberries in a large mixing bowl and set them aside.
Step 2: Mixing Ingredients
Now it’s time to mix! In the bowl with your sliced strawberries, add the granulated sugar and freshly squeezed lemon juice. Stir everything together gently, ensuring that the strawberries are well-coated with the sugar and lemon juice. This mixture will sit for about 10-15 minutes. During this time, the sugar will draw out the natural juices from the strawberries, creating a sweet syrup.
While waiting, you can prepare your cooking equipment. Grab a large pot and a wooden spoon for stirring. If you’re using pectin, now is the time to read the instructions on the package. Some pectins require you to mix them with sugar before adding them to the fruit.
Step 3: Cooking the Jam
Once your strawberries have released their juices, it’s time to cook! Pour the strawberry mixture into your large pot and place it over medium heat. Stir the mixture frequently to prevent it from sticking to the bottom of the pot. As it heats up, the sugar will dissolve, and the strawberries will begin to break down.
Bring the mixture to a rolling boil. This means it should bubble vigorously and not stop when stirred. If you’re using pectin, add it now according to the package instructions. Continue to boil for about 10-15 minutes, or until the mixture thickens. Keep an eye on it, as it can bubble up and spill over!
Step 4: Testing for Doneness
To check if your jam is ready, you can use the spoon test. Take a spoonful of the jam and let it cool for a minute. Then, run your finger through the jam on the spoon. If it holds its shape and doesn’t run back together, it’s done! If it’s still too runny, continue cooking for a few more minutes and test again.
Another method is the plate test. Place a small amount of jam on a chilled plate and let it sit for a minute. Tilt the plate; if the jam holds its shape and doesn’t run, it’s ready to be canned!
Step 5: Canning the Jam
Now that your jam is perfectly cooked, it’s time to can it! First, prepare your jars by washing them in hot, soapy water. Rinse well and place them in a hot oven (about 200°F) to sterilize. This step is crucial for keeping your jam fresh.
Once the jars are ready, carefully ladle the hot jam into each jar, leaving about 1/4 inch of space at the top. Wipe the rims of the jars with a clean cloth to remove any residue. Then, place the lids on top and screw on the metal bands until they are fingertip-tight.
Finally, process the jars in a boiling water bath for about 10 minutes. This helps seal the jars and ensures your homemade strawberry jam stays fresh for months. After processing, let the jars cool completely on a clean towel or cooling rack. You’ll hear the satisfying “pop” sound as the lids seal!
Variations of Homemade Strawberry Jam
Adding Other Fruits to Homemade Strawberry Jam
One of the best things about homemade strawberry jam is its versatility. You can easily mix in other fruits to create unique flavors! For instance, try adding blueberries or raspberries for a delightful berry blend. Simply use equal parts of strawberries and your chosen fruit. This not only enhances the taste but also adds a beautiful color to your jam.
Another delicious option is to incorporate peaches or mangoes. These fruits bring a tropical twist to your jam. Just chop them into small pieces and mix them with the strawberries during the preparation stage. The sweetness of these fruits pairs wonderfully with strawberries, creating a jam that’s bursting with flavor.
Don’t be afraid to experiment! You can even try adding citrus fruits like oranges or lemons. Their zesty notes can brighten up the sweetness of the strawberries. Just remember to adjust the sugar accordingly, as some fruits may be sweeter than others. With these variations, your homemade strawberry jam will never be boring!
Spicing Up Your Homemade Strawberry Jam
If you want to add a little kick to your homemade strawberry jam, consider spicing it up! A pinch of cinnamon can add warmth and depth to the flavor. Simply sprinkle in about 1/2 teaspoon while cooking the jam. It’s a subtle addition that can make a big difference.
For those who enjoy a bit of heat, try adding a dash of cayenne pepper or finely chopped jalapeños. This unexpected twist can create a sweet and spicy jam that’s perfect for pairing with cheese or meats. Just be cautious with the amount; a little goes a long way!
Herbs can also elevate your jam. Fresh basil or mint can add a refreshing note. Chop the herbs finely and stir them in during the last few minutes of cooking. This will infuse the jam with their aromatic flavors, making it a unique treat.
With these variations, you can customize your homemade strawberry jam to suit your taste. Whether you prefer fruity blends or spicy surprises, the possibilities are endless. Now that you have some ideas, let’s move on to cooking notes to ensure your jam turns out perfectly!
Cooking Note for Homemade Strawberry Jam
When making homemade strawberry jam, a few cooking notes can help ensure your jam turns out perfectly every time. First, always use ripe strawberries. The flavor of your jam depends heavily on the quality of the fruit. Overripe or underripe strawberries can lead to a jam that lacks sweetness or has an off taste.
Next, pay attention to the cooking temperature. Cooking the jam over medium heat allows the sugar to dissolve properly and helps the strawberries break down. If the heat is too high, the jam may burn or cook too quickly, resulting in a less desirable texture.
Stirring frequently is also essential. This prevents the jam from sticking to the bottom of the pot and burning. It also helps to evenly distribute the heat, ensuring that all the ingredients cook uniformly.
Additionally, if you’re using pectin, follow the instructions carefully. Different brands may have specific requirements for mixing and cooking times. If you’re unsure, it’s always best to refer to the package for guidance.
Lastly, remember that the jam will thicken as it cools. So, if it seems a bit runny while hot, don’t worry! It may set perfectly once it’s cooled down. However, if you find it’s still too runny after cooling, you can always re-cook it with a bit more pectin to achieve the desired consistency.
By keeping these cooking notes in mind, you’ll be well on your way to creating a delicious batch of homemade strawberry jam that you can enjoy for weeks to come!
Serving Suggestions for Homemade Strawberry Jam
Creative Ways to Use Homemade Strawberry Jam
Now that you’ve made your delicious homemade strawberry jam, it’s time to enjoy it! There are countless ways to incorporate this sweet treat into your meals and snacks. Here are some creative ideas to get you started:
- Spread on Toast: The classic way to enjoy strawberry jam is on warm toast. Spread a generous layer on your favorite bread for a delightful breakfast or snack.
- Pancake Topping: Drizzle your homemade jam over pancakes or waffles. It adds a fruity flavor that pairs perfectly with syrup and whipped cream.
- Yogurt Parfait: Layer your jam with yogurt and granola for a tasty parfait. This makes for a healthy breakfast or a satisfying dessert.
- Ice Cream Sundae: Add a spoonful of strawberry jam to your ice cream sundae. It’s a delightful way to enhance the flavor and add a fruity twist.
- Sandwich Filling: Use strawberry jam as a filling for sandwiches. It pairs wonderfully with peanut butter or cream cheese for a sweet treat.
- Cheese Board Addition: Serve your jam alongside a cheese platter. The sweetness of the jam complements various cheeses, making it a perfect pairing for gatherings.
- Baking Ingredient: Incorporate your jam into baked goods. Use it as a filling for cookies, cakes, or pastries for a burst of flavor in every bite.
- Glaze for Meats: Create a sweet glaze for meats like chicken or pork. Mix the jam with a bit of soy sauce or mustard for a unique marinade.
These serving suggestions are just the beginning! Feel free to get creative and find your own favorite ways to enjoy homemade strawberry jam. Whether you’re using it in sweet or savory dishes, this jam is sure to elevate your meals and bring a smile to your face.
Tips for Making the Best Homemade Strawberry Jam
Creating the perfect homemade strawberry jam is an art that can be mastered with a few helpful tips. These suggestions will ensure that your jam turns out delicious every time, making your efforts truly worthwhile.
First, always choose the freshest strawberries. The quality of your fruit directly impacts the flavor of your jam. Look for strawberries that are bright red, firm, and fragrant. Avoid any that are overripe or have blemishes, as they can affect the taste and texture.
Next, measure your ingredients accurately. Using the right amount of sugar and lemon juice is crucial for achieving the perfect balance of sweetness and acidity. Too much sugar can make your jam overly sweet, while too little can lead to a runny consistency. A kitchen scale can help ensure precise measurements.
When cooking your jam, use a heavy-bottomed pot. This type of pot distributes heat evenly, reducing the risk of burning. Stir the mixture frequently to prevent sticking and ensure even cooking. A wooden spoon is ideal for this task, as it allows you to scrape the bottom of the pot easily.
Don’t rush the cooking process. Allow the jam to boil at a rolling boil for the recommended time. This helps to break down the strawberries and allows the flavors to meld beautifully. Patience is key to achieving that rich, fruity flavor.
Also, consider using a candy thermometer to check the temperature of your jam. The ideal temperature for jam to set is around 220°F (104°C). This can help you avoid the guesswork and ensure your jam reaches the perfect consistency.
Lastly, always taste your jam before canning. This is your chance to adjust the sweetness or acidity if needed. If it tastes a bit flat, a splash more lemon juice can brighten it up. If it’s too sweet, a little more lemon juice can help balance it out.
By following these tips, you’ll be well on your way to making the best homemade strawberry jam. Each batch will be a delightful treat that you can enjoy and share with family and friends!
Breakdown of Time for Homemade Strawberry Jam
Prep Time
Preparing your homemade strawberry jam is a breeze! The prep time usually takes about 20 to 30 minutes. This includes washing, hulling, and slicing the strawberries. Additionally, you’ll need time to mix the strawberries with sugar and lemon juice. It’s a simple process that sets the stage for your delicious jam!
Cooking Time
Once your strawberries are ready, the cooking time is approximately 15 to 20 minutes. During this time, you’ll bring the mixture to a rolling boil and allow it to thicken. Keep stirring to prevent sticking and ensure even cooking. This is where the magic happens, transforming your fresh strawberries into a delightful jam!
Total Time
In total, you can expect to spend about 40 to 50 minutes from start to finish. This includes both prep and cooking time. Once your jam is cooked and canned, you’ll have a delicious homemade treat ready to enjoy. It’s a quick and rewarding process that’s perfect for any day!
Nutritional Information for Homemade Strawberry Jam
Calories
When it comes to enjoying homemade strawberry jam, it’s good to know the nutritional content. A typical serving size of homemade strawberry jam, which is about one tablespoon, contains approximately 50 calories. This can vary slightly based on the amount of sugar used and whether you add any additional ingredients. While it’s a sweet treat, it’s important to enjoy it in moderation as part of a balanced diet.
Protein
Homemade strawberry jam is not a significant source of protein. In fact, one tablespoon typically contains less than 1 gram of protein. The primary ingredients, strawberries and sugar, are not protein-rich. If you’re looking to boost your protein intake, consider pairing your jam with protein-rich foods like yogurt or nut butter. This way, you can enjoy the sweetness of the jam while also getting the nutrients your body needs.
Sodium
Another aspect to consider is sodium content. Homemade strawberry jam is naturally low in sodium, with about 1 milligram per tablespoon. This makes it a heart-healthy option compared to many store-bought jams that may contain added preservatives and sodium. By making your own jam, you can enjoy a delicious spread without worrying about excess sodium in your diet.
Overall, homemade strawberry jam can be a delightful addition to your meals. Just remember to enjoy it in moderation, and you’ll be able to savor its sweet flavor while keeping your nutritional goals in check!
FAQs About Homemade Strawberry Jam
How long does homemade strawberry jam last?
Homemade strawberry jam can last quite a while if stored properly. When sealed in sterilized jars and kept in a cool, dark place, it can last for up to one year. Once opened, store the jam in the refrigerator, where it will stay fresh for about 3 to 4 weeks. Always check for any signs of spoilage, such as off smells or mold, before consuming.
Can I use frozen strawberries for homemade strawberry jam?
Yes, you can absolutely use frozen strawberries to make homemade strawberry jam! Just make sure to thaw them completely and drain any excess liquid before using. Frozen strawberries can be just as flavorful as fresh ones, especially if they were frozen at peak ripeness. This is a great option if fresh strawberries are out of season or hard to find.
What is the best way to store homemade strawberry jam?
The best way to store homemade strawberry jam is in clean, sterilized jars with tight-fitting lids. After canning, let the jars cool completely before placing them in a cool, dark pantry or cupboard. Once opened, transfer the jam to the refrigerator. Always use a clean spoon to scoop out the jam to prevent contamination and extend its shelf life.
Can I reduce the sugar in homemade strawberry jam?
Yes, you can reduce the sugar in homemade strawberry jam, but it may affect the texture and sweetness. Sugar acts as a preservative and helps the jam set properly. If you want to cut back on sugar, consider using a sugar substitute or a low-sugar pectin that allows for less sugar. Just keep in mind that the flavor and consistency may vary from traditional recipes.
Conclusion on Homemade Strawberry Jam
In conclusion, making homemade strawberry jam is a delightful and rewarding experience. With just a few simple ingredients, you can create a sweet treat that brings joy to your meals and snacks. The process is not only easy but also allows you to customize flavors to suit your taste. Whether you enjoy it on toast, in desserts, or as a glaze for meats, the possibilities are endless!
As you embark on your jam-making journey, remember the importance of using fresh strawberries and following the steps carefully. Each batch you create will be a reflection of your effort and creativity. Plus, sharing your homemade jam with family and friends can create lasting memories and smiles.
So, gather your ingredients, roll up your sleeves, and dive into the world of homemade strawberry jam. It’s a sweet adventure that’s sure to brighten your day and elevate your culinary skills. Enjoy the process, savor the flavors, and relish the satisfaction of creating something truly special!
Craving more fruity and refreshing dessert recipes to indulge in? Try these delightful options:
- Homemade Strawberry Ice Cream: A Summer Delight
- Easy Homemade Strawberry Ice Cream: A Must-Try Treat
- Chef John’s Homemade Strawberry Ice Cream: Pure Delight
For more scrumptious recipes and culinary inspiration, follow us on Pinterest!