Introduction to Rich Homemade Chocolate Ice Cream: Irresistibly Creamy and Delicious
The Allure of Chocolate Ice Cream
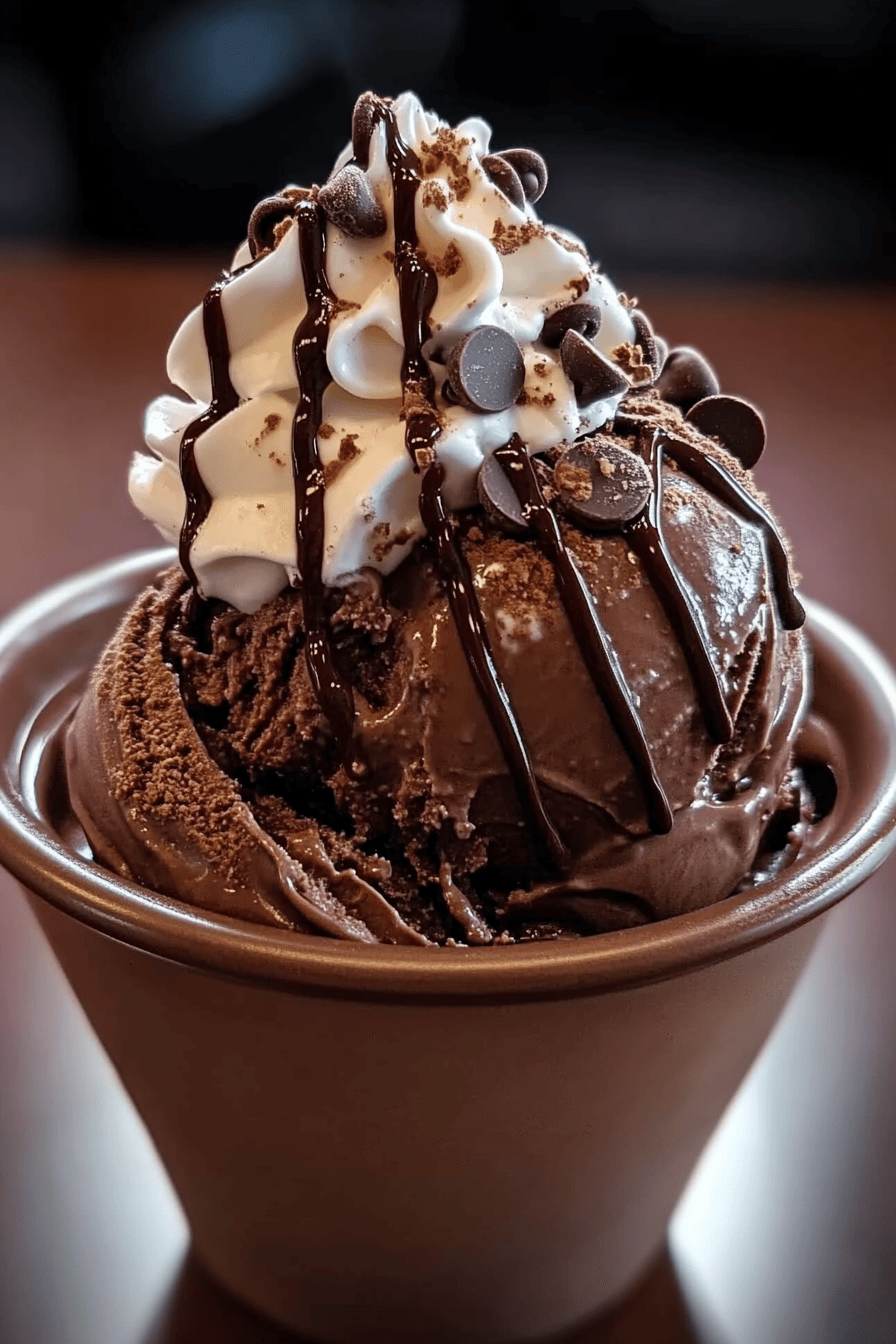
Chocolate ice cream is a classic favorite for many. Its rich, creamy texture and deep chocolate flavor make it a delightful treat. The moment you take a scoop, it melts in your mouth, bringing joy with every bite. Whether enjoyed on a hot summer day or as a comforting dessert after dinner, chocolate ice cream has a special place in our hearts. The allure of this dessert lies not just in its taste but also in the memories it creates. Think of family gatherings, birthday parties, or simply a quiet evening at home with a bowl of this deliciousness. Each scoop is a reminder of sweet moments shared with loved ones.
Why Make Homemade Ice Cream?
Making ice cream at home is a rewarding experience. First, you have complete control over the ingredients. You can choose high-quality cocoa powder and fresh cream, ensuring a rich flavor. Plus, you can adjust the sweetness to your liking. Homemade ice cream is also free from preservatives and artificial flavors, making it a healthier option. Another reason to make it yourself is the fun of the process! Churning the mixture and waiting for it to freeze builds excitement. Finally, sharing your homemade creation with friends and family adds a personal touch that store-bought ice cream simply can’t match. So, why not dive into this delightful adventure and create your own rich homemade chocolate ice cream?
Ingredients for Rich Homemade Chocolate Ice Cream: Irresistibly Creamy and Delicious
To create your own rich homemade chocolate ice cream, you’ll need a few simple yet essential ingredients. Each one plays a vital role in achieving that creamy, dreamy texture and deep chocolate flavor. Here’s what you’ll need:
- 2 cups heavy cream: This is the base of your ice cream. Heavy cream gives it that rich and creamy texture.
- 1 cup sweetened condensed milk: This adds sweetness and creaminess, making your ice cream irresistibly smooth.
- 1 cup whole milk: Whole milk helps balance the richness of the cream while keeping the ice cream soft.
- 3/4 cup unsweetened cocoa powder: Choose high-quality cocoa powder for the best chocolate flavor. This is the star ingredient!
- 1 teaspoon vanilla extract: A hint of vanilla enhances the chocolate flavor and adds depth.
- Pinch of salt: Just a small amount of salt can elevate the sweetness and flavor of the chocolate.
These ingredients come together to create a luscious chocolate ice cream that is sure to impress. Feel free to gather them before you start the preparation process. Having everything ready will make your ice cream-making adventure smooth and enjoyable!
Step-by-Step Preparation of Rich Homemade Chocolate Ice Cream: Irresistibly Creamy and Delicious
Step 1: Gather Your Ingredients
Before you start making your rich homemade chocolate ice cream, it’s important to gather all your ingredients. This step ensures you have everything you need at your fingertips. Here’s a quick checklist:
- 2 cups heavy cream
- 1 cup sweetened condensed milk
- 1 cup whole milk
- 3/4 cup unsweetened cocoa powder
- 1 teaspoon vanilla extract
- Pinch of salt
Having your ingredients ready will make the process smoother and more enjoyable. Plus, it builds excitement as you prepare to create something delicious!
Step 2: Mix the Base
Now that you have everything ready, it’s time to mix the base. In a large mixing bowl, combine the heavy cream, sweetened condensed milk, and whole milk. Whisk them together until they are well blended. Next, add the unsweetened cocoa powder, vanilla extract, and a pinch of salt. Whisk again until the mixture is smooth and creamy. This step is crucial as it sets the foundation for your ice cream. The cocoa powder should be fully incorporated, leaving no lumps behind. The result should be a rich, chocolatey mixture that smells heavenly!
Step 3: Churn the Ice Cream
Once your base is ready, it’s time to churn! If you have an ice cream maker, pour the mixture into the machine and follow the manufacturer’s instructions. Churning incorporates air into the ice cream, making it light and fluffy. If you don’t have an ice cream maker, don’t worry! You can still make delicious ice cream. Simply pour the mixture into a shallow dish and place it in the freezer. Every 30 minutes, stir the mixture with a fork to break up any ice crystals. Repeat this process for about 2-3 hours until the ice cream is thick and creamy.
Step 4: Freeze and Set
After churning, transfer your ice cream to an airtight container. Smooth the top with a spatula and cover it tightly. Place the container in the freezer for at least 4 hours, or until the ice cream is firm. This final freezing step is essential for achieving that perfect scoopable texture. Once it’s set, your rich homemade chocolate ice cream is ready to be enjoyed! Just scoop it into bowls or cones, and get ready to indulge in a creamy, chocolatey delight.
Variations of Rich Homemade Chocolate Ice Cream: Irresistibly Creamy and Delicious
Adding Mix-Ins
One of the best parts about making homemade chocolate ice cream is the ability to customize it. Adding mix-ins can elevate your ice cream to a whole new level! Consider incorporating your favorite treats. Here are some delicious options:
- Chocolate Chips: Fold in semi-sweet or dark chocolate chips for an extra chocolatey crunch.
- Nuts: Chopped walnuts or pecans add a delightful texture and nutty flavor.
- Marshmallows: Mini marshmallows can create a fun, chewy surprise in every scoop.
- Cookie Dough: Small pieces of cookie dough can make your ice cream feel like a dessert dream.
- Fruit: Fresh raspberries or strawberries can add a refreshing contrast to the rich chocolate.
When adding mix-ins, do so after churning the ice cream. Gently fold them into the mixture before transferring it to the freezer. This way, you’ll ensure an even distribution throughout your creamy treat!
Alternative Sweeteners
If you’re looking for a healthier option, consider using alternative sweeteners. These can help reduce sugar while still keeping your ice cream delicious. Here are some popular choices:
- Honey: A natural sweetener that adds a unique flavor. Use about 3/4 cup for the same sweetness.
- Maple Syrup: This adds a lovely caramel-like taste. Use the same amount as sweetened condensed milk.
- Stevia: A zero-calorie sweetener. Start with a small amount and adjust to taste, as it’s much sweeter than sugar.
When using alternative sweeteners, keep in mind that they may change the texture slightly. Experiment to find the perfect balance for your taste buds!
Dairy-Free Options
For those who are lactose intolerant or following a dairy-free diet, you can still enjoy rich homemade chocolate ice cream! Here’s how to make it dairy-free:
- Coconut Milk: Use full-fat coconut milk instead of heavy cream and whole milk. This will give your ice cream a creamy texture.
- Almond Milk: Unsweetened almond milk can be a lighter option. Combine it with coconut cream for added richness.
- Cashew Cream: Blend soaked cashews with water to create a creamy base. This adds a nutty flavor and smooth texture.
Follow the same preparation steps as the original recipe, and you’ll have a delicious dairy-free chocolate ice cream that everyone can enjoy!
Cooking Note for Rich Homemade Chocolate Ice Cream: Irresistibly Creamy and Delicious
When making rich homemade chocolate ice cream, a few cooking notes can help you achieve the best results. First, always use high-quality ingredients. The cocoa powder you choose can significantly impact the flavor. Opt for unsweetened cocoa powder that is rich and dark for a more intense chocolate taste.
Next, ensure that your heavy cream and whole milk are cold before mixing. Cold ingredients help the ice cream churn better, resulting in a smoother texture. If you have time, chill your mixing bowl and whisk in the freezer for about 15 minutes before starting. This extra step can help keep the mixture cold during preparation.
While churning, keep an eye on the consistency. If you’re using an ice cream maker, it usually takes about 20-30 minutes to reach the right texture. If you’re stirring by hand, remember to break up ice crystals every 30 minutes. This will help create a creamier ice cream.
Lastly, patience is key! After churning, allow your ice cream to freeze for at least 4 hours. This step is crucial for achieving that perfect scoopable texture. Rushing this process can lead to a softer ice cream that may not hold its shape when served.
By following these cooking notes, you’ll be well on your way to creating a rich homemade chocolate ice cream that is irresistibly creamy and delicious. Enjoy the process and the delightful results!
Serving Suggestions for Rich Homemade Chocolate Ice Cream: Irresistibly Creamy and Delicious
Pairing with Toppings
Once your rich homemade chocolate ice cream is ready, it’s time to think about toppings! The right toppings can enhance the flavor and add a fun twist to your dessert. Here are some delightful options to consider:
- Whipped Cream: A dollop of freshly whipped cream adds a light and airy touch to your chocolate ice cream.
- Chocolate Sauce: Drizzle warm chocolate sauce over the top for an extra chocolatey experience.
- Sprinkles: Colorful sprinkles can make your dessert look festive and fun, perfect for parties!
- Crushed Cookies: Crushed Oreos or chocolate wafers can add a crunchy texture that pairs beautifully with the creamy ice cream.
- Fresh Berries: Raspberries or strawberries not only add a pop of color but also a refreshing contrast to the rich chocolate.
Feel free to mix and match these toppings to create your perfect bowl of ice cream. The combinations are endless, and each scoop can be a new adventure!
Serving in Desserts
Your rich homemade chocolate ice cream can also shine as a star ingredient in various desserts. Here are some creative ways to serve it:
- Ice Cream Sundaes: Layer your chocolate ice cream with toppings like nuts, whipped cream, and a cherry on top for a classic sundae.
- Chocolate Ice Cream Sandwiches: Scoop the ice cream between two cookies for a delicious treat that’s fun to eat.
- Brownie Sundaes: Serve a scoop of chocolate ice cream on top of warm brownies for a decadent dessert.
- Milkshakes: Blend your chocolate ice cream with milk for a rich and creamy milkshake that’s perfect for hot days.
- Chocolate Ice Cream Cake: Use layers of chocolate ice cream between cake layers for a show-stopping dessert at any celebration.
These serving suggestions will not only elevate your chocolate ice cream but also impress your family and friends. Enjoy experimenting with different combinations and creating delightful desserts!
Tips for Perfecting Rich Homemade Chocolate Ice Cream: Irresistibly Creamy and Delicious
Choosing the Right Cocoa Powder
When it comes to making rich homemade chocolate ice cream, the cocoa powder you choose can make a big difference. Not all cocoa powders are created equal! For the best flavor, opt for high-quality unsweetened cocoa powder. Look for brands that are rich and dark, as they provide a deeper chocolate taste. Dutch-processed cocoa powder is another excellent choice. It has a smoother flavor and a darker color, which can enhance the overall appearance of your ice cream.
Before purchasing, check the label for the cocoa content. Higher cocoa content usually means a more intense flavor. If you can, try a few different brands to find your favorite. Remember, the cocoa powder is the star of your ice cream, so investing in a good one will pay off in deliciousness!
Storage Tips
Once you’ve made your rich homemade chocolate ice cream, proper storage is key to keeping it fresh and tasty. First, transfer the ice cream to an airtight container. This helps prevent ice crystals from forming and keeps your ice cream creamy. If you have a large batch, consider dividing it into smaller containers. This way, you can enjoy it in portions without exposing the entire batch to air each time.
Store your ice cream in the coldest part of the freezer, usually at the back. Avoid placing it near the door, where temperature fluctuations can occur. For the best texture, consume your ice cream within two weeks. However, if stored properly, it can last up to a month. Just remember to let it sit at room temperature for a few minutes before scooping. This will make it easier to serve and ensure you get that perfect scoop every time!
Breakdown of Time for Rich Homemade Chocolate Ice Cream: Irresistibly Creamy and Delicious
Prep Time
Preparing your rich homemade chocolate ice cream is a breeze! The prep time is about 15 minutes. This includes gathering your ingredients, mixing the base, and getting everything ready for churning. It’s a quick and enjoyable process that sets the stage for your delicious treat. Just imagine the delightful chocolate aroma filling your kitchen as you whisk everything together!
Cooking Time
The cooking time, or rather the churning time, varies depending on your method. If you’re using an ice cream maker, it typically takes around 20 to 30 minutes to churn the mixture until it reaches a creamy consistency. If you’re making it by hand, you’ll need to stir the mixture every 30 minutes for about 2 to 3 hours. This method requires a bit more patience, but the results are just as rewarding!
Total Time
In total, you should plan for about 4 to 5 hours to make your rich homemade chocolate ice cream. This includes the prep time, cooking time, and the final freezing time. After churning, it’s essential to freeze the ice cream for at least 4 hours to achieve that perfect scoopable texture. So, while the active time is short, the waiting is well worth it for a creamy, chocolatey delight!
Nutritional Information for Rich Homemade Chocolate Ice Cream: Irresistibly Creamy and Delicious
Calories
When indulging in rich homemade chocolate ice cream, it’s good to know the calorie content. A typical serving size of about 1/2 cup contains approximately 250-300 calories. This can vary based on the specific ingredients you use, especially if you opt for alternative sweeteners or dairy-free options. While it’s a treat, enjoying it in moderation can help you savor the deliciousness without overdoing it!
Protein
Protein is an essential nutrient, and your homemade chocolate ice cream can provide a decent amount. Each serving typically contains around 4-5 grams of protein. This comes mainly from the milk and cream used in the recipe. If you choose to use dairy-free alternatives, the protein content may vary. For example, coconut milk has less protein than cow’s milk. So, if you’re looking to boost the protein content, consider adding some nuts or using a protein-rich milk alternative.
Sodium
Sodium levels in your rich homemade chocolate ice cream are relatively low. A serving usually contains about 50-70 mg of sodium. This is mainly from the pinch of salt added to enhance the flavor. If you’re watching your sodium intake, you can adjust the amount of salt or skip it altogether. However, a small amount of salt can really elevate the sweetness and overall flavor of the ice cream, making it a worthwhile addition!
FAQs about Rich Homemade Chocolate Ice Cream: Irresistibly Creamy and Delicious
Can I use regular milk instead of sweetened condensed milk?
While you can use regular milk, it won’t provide the same creamy texture and sweetness as sweetened condensed milk. Sweetened condensed milk is thicker and adds a rich flavor that regular milk lacks. If you want to substitute, consider using a combination of whole milk and sugar. For every cup of regular milk, add about 1/3 cup of sugar to mimic the sweetness and creaminess of sweetened condensed milk. This way, you can still enjoy a delicious chocolate ice cream!
How long does homemade chocolate ice cream last?
Homemade chocolate ice cream can last up to a month when stored properly in an airtight container. However, for the best taste and texture, it’s recommended to consume it within two weeks. Over time, ice crystals may form, affecting the creaminess. To keep your ice cream fresh, always ensure the container is tightly sealed and stored in the coldest part of your freezer. This will help maintain its delightful flavor and texture!
Can I make this ice cream without an ice cream maker?
Absolutely! You can make rich homemade chocolate ice cream without an ice cream maker. Simply pour the mixture into a shallow dish and place it in the freezer. Every 30 minutes, stir the mixture with a fork to break up any ice crystals. Repeat this process for about 2-3 hours until the ice cream reaches a thick and creamy consistency. This method may take a bit longer, but the results will still be delicious!
What can I do if my ice cream is too hard?
If your ice cream turns out too hard, don’t worry! This can happen if it’s been frozen for too long. To soften it, simply let it sit at room temperature for about 5-10 minutes before scooping. This will make it easier to serve. If you find that your ice cream is consistently too hard, consider adding a bit more sweetened condensed milk next time. This will help create a softer texture. Enjoy your creamy chocolate treat!
Conclusion on Rich Homemade Chocolate Ice Cream: Irresistibly Creamy and Delicious
In conclusion, making rich homemade chocolate ice cream is a delightful experience that brings joy to both the maker and the eater. With just a few simple ingredients, you can create a creamy, chocolatey treat that is perfect for any occasion. Whether you enjoy it on its own or as part of a dessert, this ice cream is sure to impress.
Remember, the beauty of homemade ice cream lies in its versatility. You can customize it with mix-ins, alternative sweeteners, or even make it dairy-free. The possibilities are endless! Plus, the satisfaction of sharing your creation with family and friends adds a special touch that store-bought options simply can’t match.
So, gather your ingredients, follow the steps, and embark on this delicious journey. Your taste buds will thank you for it! Enjoy every scoop of your rich homemade chocolate ice cream, and don’t forget to share the joy with those you love. Happy ice cream making!
Indulge in more frozen delights with these homemade ice cream recipes:
- Homemade Carrot Cake Ice Cream with Cream Cheese Swirl: A Sweet Delight
- Homemade Chocolate Covered Ice Cream Bars: Pure Decadence
- Homemade Chocolate Chip Cookie Dough Ice Cream: A Classic Favorite
For more fantastic recipes and food inspiration, follow us on Pinterest!