Introduction to Peppermint Crisp Lemon Tart
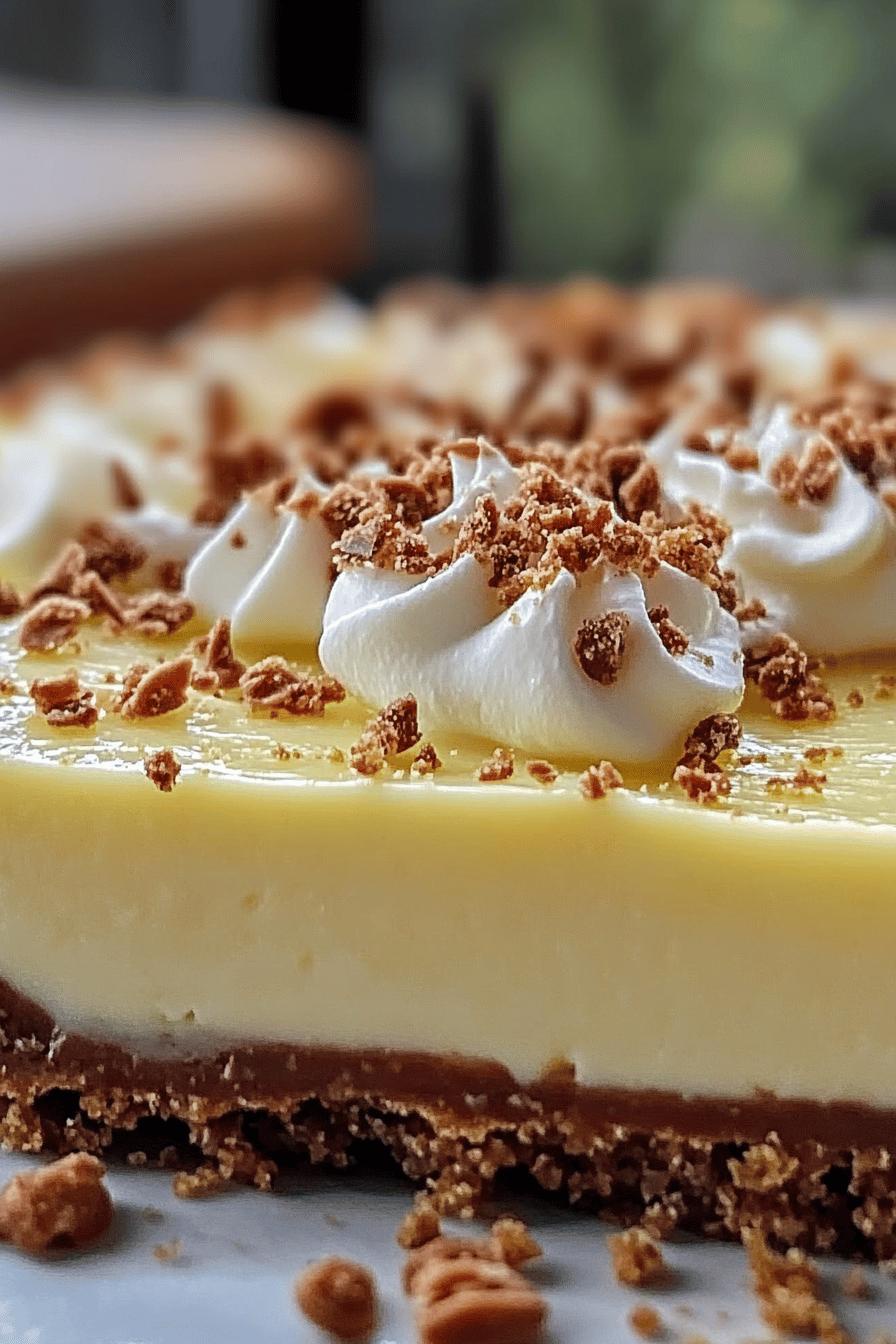
Welcome to the world of delightful desserts! Today, we’re diving into the refreshing and exciting Peppermint Crisp Lemon Tart. This dessert is not just a treat for your taste buds; it’s a feast for your eyes too. The combination of zesty lemon and crunchy Peppermint Crisp chocolate creates a unique flavor that is both sweet and tangy. It’s a dessert that stands out at any gathering, making it a favorite among friends and family.
What Makes Peppermint Crisp Lemon Tart Special?
What sets this tart apart? It’s all about the balance of flavors. The tartness of fresh lemons pairs beautifully with the sweet, minty crunch of Peppermint Crisp chocolate. This combination creates a refreshing experience that is perfect for warm days or festive occasions. Plus, the creamy filling and crumbly crust add delightful textures that make each bite a joy. Whether you’re a lemon lover or a chocolate enthusiast, this tart has something for everyone!
The Perfect Dessert for Any Occasion
Looking for a dessert that fits any event? Look no further! The Peppermint Crisp Lemon Tart is versatile enough for birthdays, holidays, or just a cozy family dinner. Its vibrant colors and unique flavors make it a showstopper on any dessert table. Plus, it’s easy to prepare, so you can whip it up without spending hours in the kitchen. Whether you’re celebrating a special moment or simply treating yourself, this tart is sure to impress.
Ingredients for Peppermint Crisp Lemon Tart
To create your own Peppermint Crisp Lemon Tart, you’ll need a few simple ingredients. Each component plays a vital role in achieving that perfect balance of flavors and textures. Here’s what you’ll need:
- For the Tart Crust:
- 1 ½ cups digestive biscuits, crushed
- ½ cup unsalted butter, melted
- 2 tablespoons sugar
- For the Lemon Filling:
- 1 cup fresh lemon juice (about 4-5 lemons)
- 1 cup granulated sugar
- 4 large eggs
- 1 cup heavy cream
- 1 teaspoon vanilla extract
- For the Topping:
- 1 cup Peppermint Crisp chocolate, chopped
- Fresh mint leaves for garnish (optional)
These ingredients come together to create a delightful tart that is both refreshing and satisfying. The digestive biscuits provide a crunchy base, while the lemon filling offers a creamy, tangy contrast. Finally, the Peppermint Crisp chocolate adds a sweet, minty crunch that elevates this dessert to a whole new level. Gather these ingredients, and you’re ready to start your baking adventure!
Step-by-Step Preparation of Peppermint Crisp Lemon Tart
Now that you have all your ingredients ready, it’s time to bring your Peppermint Crisp Lemon Tart to life! Follow these simple steps to create a dessert that will wow your family and friends. Each step is easy to follow, ensuring that you can enjoy the process as much as the final result.
Step 1: Preparing the Tart Crust
First, let’s make the tart crust. This step is crucial as it forms the base of your delicious dessert. Start by preheating your oven to 350°F (175°C). In a mixing bowl, combine the crushed digestive biscuits, melted butter, and sugar. Mix well until the crumbs are evenly coated with butter.
Next, press the mixture firmly into the bottom and up the sides of a tart pan. Make sure it’s packed tightly to create a sturdy crust. Once done, place the tart pan in the preheated oven and bake for about 10 minutes. This will help the crust set and become golden brown. After baking, remove it from the oven and let it cool completely.
Step 2: Making the Lemon Filling
While the crust cools, it’s time to prepare the lemon filling. In a large mixing bowl, whisk together the fresh lemon juice and granulated sugar until the sugar dissolves. Then, add the eggs one at a time, whisking well after each addition. This ensures a smooth and creamy filling.
Next, stir in the heavy cream and vanilla extract. Mix until everything is well combined. The filling should be smooth and slightly thick. This mixture will create that delightful tangy flavor that pairs perfectly with the sweet chocolate topping.
Step 3: Assembling the Tart
Now comes the fun part—assembling your tart! Pour the lemon filling into the cooled tart crust, spreading it evenly. Make sure to leave a little space at the top, as the filling may puff up slightly while baking. Place the tart back in the oven and bake for about 25-30 minutes, or until the filling is set but still slightly jiggly in the center.
Once baked, remove the tart from the oven and let it cool at room temperature. This cooling step is essential for the filling to firm up properly.
Step 4: Chilling the Tart
After the tart has cooled, it’s time to chill it in the refrigerator. Cover the tart with plastic wrap and let it chill for at least 2 hours, or overnight if you have the time. Chilling allows the flavors to meld together beautifully and makes slicing easier.
Once chilled, your Peppermint Crisp Lemon Tart is ready for the final touch! Just before serving, sprinkle the chopped Peppermint Crisp chocolate on top and garnish with fresh mint leaves if desired. Now, you’re all set to enjoy a slice of this delightful dessert!
Variations of Peppermint Crisp Lemon Tart
If you’re looking to add a personal touch to your Peppermint Crisp Lemon Tart, there are plenty of variations to explore! By swapping out a few ingredients or adding new flavors, you can create a unique dessert that suits your taste. Let’s dive into some alternative ingredients and serving suggestions that will elevate your tart experience.
Alternative Ingredients for a Unique Twist
Experimenting with different ingredients can lead to exciting new flavors. Here are some ideas to consider:
- Chocolate Crust: Instead of using digestive biscuits, try a chocolate cookie crust. This adds a rich chocolate flavor that pairs wonderfully with the lemon filling.
- Fruit Additions: Incorporate fresh berries like raspberries or blueberries into the lemon filling. They add a burst of color and a fruity twist that complements the tartness of the lemon.
- Herbal Infusions: For a refreshing twist, infuse the lemon filling with fresh herbs like basil or thyme. This unexpected flavor combination can surprise and delight your guests.
- Alternative Chocolates: If Peppermint Crisp isn’t available, consider using dark chocolate or white chocolate with mint flavoring. This will still give you that delightful crunch and minty taste.
These variations allow you to customize your tart to fit your preferences or the season. Feel free to get creative and make it your own!
Serving Suggestions for Different Occasions
How you serve your Peppermint Crisp Lemon Tart can enhance the overall experience. Here are some serving suggestions for various occasions:
- Summer Gatherings: Serve the tart chilled with a scoop of vanilla ice cream on the side. The cold ice cream complements the tartness of the lemon beautifully.
- Holiday Celebrations: Decorate the tart with festive toppings like edible glitter or seasonal fruits. This adds a touch of elegance and makes it perfect for special occasions.
- Casual Family Dinners: Slice the tart into small squares and serve on a platter with fresh mint leaves. This makes it easy for guests to grab a piece and enjoy.
- Picnics: Pack individual slices in small containers for a portable dessert option. It’s a fun way to enjoy this delicious tart outdoors!
With these variations and serving ideas, your Peppermint Crisp Lemon Tart will be a hit at any event. Enjoy the process of making it and the joy it brings to those who taste it!
Cooking Note for Peppermint Crisp Lemon Tart
When preparing your Peppermint Crisp Lemon Tart, a few cooking notes can help ensure your dessert turns out perfectly. These tips will guide you through the process and help you avoid common pitfalls.
First, always use fresh lemons for the best flavor. Fresh lemon juice has a bright, zesty taste that bottled juice simply can’t match. When juicing lemons, roll them on the counter with your palm before cutting. This helps release more juice!
Next, be mindful of the baking time. Every oven is different, so keep an eye on your tart as it bakes. The filling should be set but still have a slight jiggle in the center when you take it out. Overbaking can lead to a dry filling, which is not what you want.
Additionally, allow the tart to cool completely before chilling it in the refrigerator. This step is crucial for achieving the right texture. If you chill it while it’s still warm, condensation can form, making the crust soggy.
Lastly, when adding the Peppermint Crisp chocolate on top, do this just before serving. This keeps the chocolate crunchy and prevents it from melting into the filling. A sprinkle of fresh mint leaves can also add a pop of color and freshness to your presentation.
By following these cooking notes, you’ll create a Peppermint Crisp Lemon Tart that is not only delicious but also visually appealing. Enjoy the process and the delightful results!
Serving Suggestions for Peppermint Crisp Lemon Tart
Once your Peppermint Crisp Lemon Tart is ready, it’s time to think about how to serve it. The way you present your dessert can enhance the overall experience for your guests. Here are some delightful pairing ideas and presentation tips to make your tart shine!
Pairing with Beverages
Choosing the right beverages to accompany your Peppermint Crisp Lemon Tart can elevate the flavors even more. Here are some excellent pairing options:
- Refreshing Iced Tea: A glass of iced lemon tea or mint tea complements the tart’s flavors beautifully. The coolness of the tea balances the sweetness of the dessert.
- Crisp White Wine: A chilled Sauvignon Blanc or a light Riesling pairs well with the tart. The acidity in the wine enhances the lemony goodness of the tart.
- Sparkling Water: For a non-alcoholic option, serve sparkling water with a slice of lemon. The bubbles add a refreshing touch that cleanses the palate.
- Decaf Coffee: If you prefer coffee, a cup of decaffeinated coffee can be a lovely match. The rich flavor of coffee contrasts nicely with the tartness of the lemon.
These beverage pairings will not only complement your Peppermint Crisp Lemon Tart but also create a delightful dining experience for your guests.
Presentation Ideas for Serving
How you present your Peppermint Crisp Lemon Tart can make it even more appealing. Here are some creative ideas to consider:
- Elegant Plating: Serve slices of the tart on individual dessert plates. Drizzle a bit of lemon sauce or chocolate sauce around the plate for a beautiful presentation.
- Garnish with Fresh Mint: Add a sprig of fresh mint on top of each slice. This not only looks pretty but also adds a hint of freshness to each bite.
- Use a Tart Stand: Display the whole tart on a decorative cake stand. This elevates the tart and makes it the centerpiece of your dessert table.
- Edible Flowers: For a touch of elegance, consider adding edible flowers around the tart. They add color and a whimsical touch to your presentation.
With these serving suggestions and presentation ideas, your Peppermint Crisp Lemon Tart will not only taste amazing but also look stunning. Enjoy sharing this delightful dessert with your loved ones!
Tips for Perfecting Your Peppermint Crisp Lemon Tart
Creating the perfect Peppermint Crisp Lemon Tart is all about attention to detail. With a few helpful tips, you can avoid common pitfalls and ensure your dessert turns out just right. Let’s explore some common mistakes to avoid and how to store any leftovers properly.
Common Mistakes to Avoid
Even the best bakers can make mistakes. Here are some common ones to watch out for:
- Using Bottled Lemon Juice: Always opt for fresh lemon juice. Bottled juice lacks the vibrant flavor that fresh lemons provide. Fresh juice makes a big difference in taste!
- Overmixing the Filling: When combining the lemon filling ingredients, mix just until combined. Overmixing can introduce too much air, leading to a filling that puffs up too much while baking.
- Not Cooling the Crust: Allow the tart crust to cool completely before adding the filling. If the crust is warm, it can cause the filling to cook unevenly.
- Skipping the Chilling Step: Chilling the tart is essential for the flavors to meld and for the filling to set properly. Don’t rush this step; it’s worth the wait!
- Adding Toppings Too Early: Wait until just before serving to add the Peppermint Crisp chocolate. This keeps it crunchy and prevents it from melting into the filling.
By avoiding these common mistakes, you’ll be on your way to creating a stunning and delicious Peppermint Crisp Lemon Tart that everyone will love!
Storage Tips for Leftovers
If you happen to have any leftovers (which is rare with this delicious tart!), proper storage is key to keeping it fresh. Here are some tips:
- Refrigerate Promptly: After serving, cover the tart with plastic wrap or aluminum foil and place it in the refrigerator. This helps maintain its freshness and prevents it from absorbing other odors.
- Consume Within a Few Days: For the best taste and texture, enjoy your leftover tart within 3-4 days. The longer it sits, the more the crust may soften.
- Freeze for Longer Storage: If you want to keep the tart for a longer period, consider freezing it. Wrap it tightly in plastic wrap and then in aluminum foil. It can last up to 2 months in the freezer.
- Thawing Tips: When ready to enjoy your frozen tart, thaw it in the refrigerator overnight. This helps maintain its texture and flavor.
With these storage tips, you can savor your Peppermint Crisp Lemon Tart even after the first serving. Enjoy every delicious bite!
Breakdown of Time for Peppermint Crisp Lemon Tart
Understanding the time needed to prepare your Peppermint Crisp Lemon Tart is essential for planning. Here’s a simple breakdown of the time required for each step, so you can manage your baking schedule effectively.
Prep Time
The prep time for your Peppermint Crisp Lemon Tart is approximately 30 minutes. This includes gathering your ingredients, preparing the tart crust, and making the lemon filling. It’s a straightforward process, and with everything ready, you’ll be on your way to a delicious dessert in no time!
Cooking Time
Once you’ve prepped your ingredients, the cooking time is about 40 minutes. This includes baking the tart crust for 10 minutes and then baking the assembled tart for 25-30 minutes. Keep an eye on it to ensure the filling is set but still slightly jiggly in the center. This careful timing is key to achieving the perfect texture!
Total Time
In total, you can expect to spend around 2 hours and 10 minutes from start to finish. This includes the prep time, cooking time, and the essential chilling time of at least 2 hours. If you can, letting the tart chill overnight will enhance the flavors even more. So, plan ahead and enjoy the delightful process of creating this refreshing dessert!
Nutritional Information for Peppermint Crisp Lemon Tart
Understanding the nutritional content of your Peppermint Crisp Lemon Tart can help you enjoy it mindfully. This dessert, while delicious, does contain sugar and fats, so it’s good to know what you’re indulging in. Below, we break down the calories and macronutrients, along with some health considerations to keep in mind.
Calories and Macronutrients
On average, a slice of Peppermint Crisp Lemon Tart (about 1/8 of the tart) contains approximately:
- Calories: 320
- Fat: 20g
- Carbohydrates: 35g
- Sugar: 22g
- Protein: 4g
These values can vary based on the specific ingredients used and portion sizes. The tart is rich in flavor, thanks to the combination of lemon and chocolate, but it’s also important to enjoy it in moderation. The heavy cream and butter contribute to the fat content, while the sugar adds sweetness.
Health Considerations
While the Peppermint Crisp Lemon Tart is a delightful treat, there are a few health considerations to keep in mind:
- Moderation is Key: Due to its sugar and fat content, it’s best to enjoy this tart as an occasional treat rather than a regular dessert.
- Allergies: This recipe contains common allergens such as dairy and eggs. If you or your guests have allergies, consider alternative ingredients.
- Balanced Diet: Pairing a slice of tart with fresh fruit or a light salad can help balance your meal. This way, you can enjoy the sweetness while still incorporating healthy options.
- Homemade Benefits: Making this tart at home allows you to control the ingredients. You can opt for lower sugar or healthier substitutes if desired.
By being aware of the nutritional information and health considerations, you can savor your Peppermint Crisp Lemon Tart while maintaining a balanced approach to your diet. Enjoy every delicious bite!
FAQs about Peppermint Crisp Lemon Tart
Can I make Peppermint Crisp Lemon Tart ahead of time?
Absolutely! The Peppermint Crisp Lemon Tart is perfect for making ahead of time. In fact, it tastes even better after chilling overnight. This allows the flavors to meld beautifully. Just prepare the tart, chill it in the refrigerator, and it will be ready to serve when you need it. This makes it a great option for parties or gatherings, as you can focus on other preparations without worrying about dessert!
What can I substitute for Peppermint Crisp chocolate?
If Peppermint Crisp chocolate isn’t available, don’t worry! You can easily substitute it with other options. Dark chocolate or white chocolate with mint flavoring works well. You can also use crushed mint candies or chocolate-covered mint candies for a similar crunch and flavor. These alternatives will still give your tart that delightful minty touch, ensuring it remains a delicious treat!
How do I store leftover Peppermint Crisp Lemon Tart?
To keep your leftover Peppermint Crisp Lemon Tart fresh, cover it tightly with plastic wrap or aluminum foil. Store it in the refrigerator, where it can last for about 3-4 days. If you want to keep it longer, consider freezing it. Wrap the tart tightly in plastic wrap and then in aluminum foil. It can be frozen for up to 2 months. When you’re ready to enjoy it again, simply thaw it in the refrigerator overnight for the best results!
Is Peppermint Crisp Lemon Tart suitable for special diets?
The Peppermint Crisp Lemon Tart contains common allergens like dairy and eggs, making it unsuitable for those with specific dietary restrictions. However, you can modify the recipe to accommodate different diets. For a dairy-free version, use coconut cream instead of heavy cream and a dairy-free butter substitute for the crust. If you need an egg-free option, consider using a flaxseed or chia seed mixture as a binding agent. These adjustments can help you create a delicious tart that everyone can enjoy!
Conclusion: Enjoying Your Peppermint Crisp Lemon Tart
In conclusion, the Peppermint Crisp Lemon Tart is more than just a dessert; it’s an experience that brings joy to any occasion. With its perfect blend of zesty lemon and crunchy Peppermint Crisp chocolate, this tart is sure to delight your taste buds and impress your guests. Whether you’re celebrating a special event or simply indulging in a sweet treat, this recipe is a fantastic choice.
As you prepare your tart, remember to enjoy the process. Baking is not just about the end result; it’s about the love and care you put into each step. From mixing the ingredients to watching the tart bake to perfection, every moment is a chance to create something wonderful.
Once your Peppermint Crisp Lemon Tart is ready, take a moment to appreciate its beauty. The vibrant colors and delightful textures make it a feast for the eyes as well as the palate. Serve it with your favorite beverages, and don’t forget to share it with family and friends. After all, desserts are best enjoyed together!
So, gather your ingredients, follow the steps, and treat yourself to a slice of this delicious tart. You’ll find that it’s not just a dessert; it’s a sweet memory waiting to be made. Enjoy every bite of your Peppermint Crisp Lemon Tart, and let it bring a smile to your face!
Relevant Recipes Link:
Craving more delightful recipes to try? How about exploring these tasty options:
- Peppermint Ice Cream Cake: A Festive Treat
- Peppermint Cheesecake Cookie Delight: Irresistibly Delicious
- Refreshing Peach Lemonade: Perfect for Summer
For more culinary inspiration and mouthwatering recipes, follow us on Pinterest!