Introduction to Cherry Garcia Ice Cream
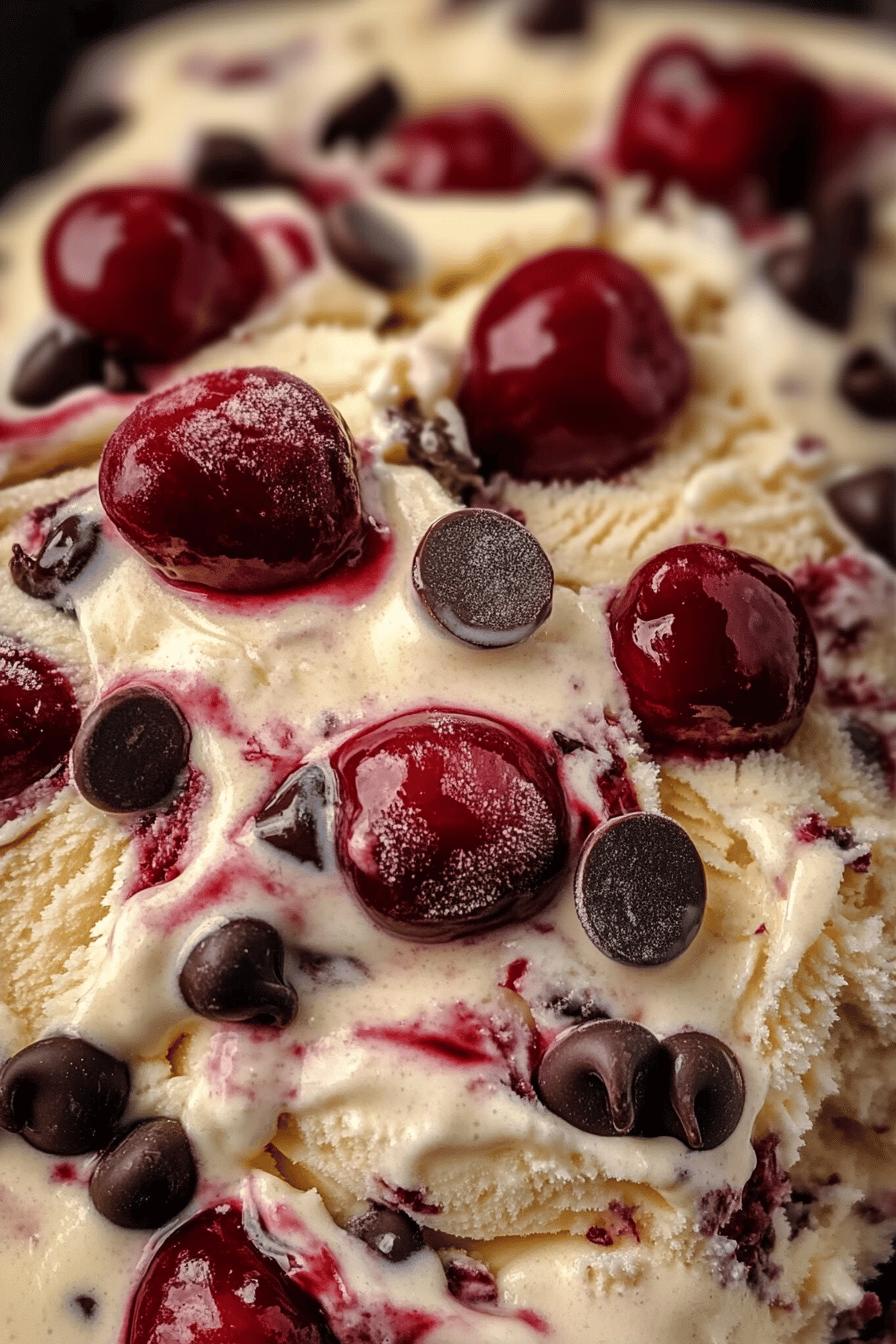
Cherry Garcia ice cream is a delightful treat that brings joy to many. This creamy dessert is not just any ice cream; it’s a celebration of flavors. With its sweet cherry puree, rich chocolate chips, and fresh cherries, it creates a perfect harmony of taste. Whether you’re enjoying it on a hot summer day or as a sweet ending to a meal, Cherry Garcia ice cream is sure to please.
What Makes Cherry Garcia Ice Cream Special?
What sets Cherry Garcia ice cream apart? First, it’s the unique combination of flavors. The sweet and tart cherries blend beautifully with the smooth chocolate. This balance makes every bite a delightful experience. Additionally, the texture is creamy and rich, making it a favorite among ice cream lovers. The vibrant color of the cherries adds visual appeal, making it as pleasing to the eyes as it is to the palate.
Moreover, this ice cream is versatile. You can enjoy it on its own or pair it with various toppings. From whipped cream to nuts, the options are endless. This adaptability makes Cherry Garcia ice cream a go-to dessert for any occasion. Whether you’re hosting a party or just treating yourself, it’s a crowd-pleaser.
The History Behind Cherry Garcia Ice Cream
Cherry Garcia ice cream has an interesting history. It was created by the famous ice cream company Ben & Jerry’s in 1987. The flavor was named after the legendary musician Jerry Garcia, who was a member of the Grateful Dead. The band’s fans loved the flavor, and it quickly became a favorite among ice cream enthusiasts.
Since its launch, Cherry Garcia has gained a loyal following. It represents not just a delicious dessert but also a connection to music and culture. The combination of cherries and chocolate reflects the creativity and spirit of the Grateful Dead. Today, it remains one of Ben & Jerry’s most popular flavors, enjoyed by people of all ages.
In summary, Cherry Garcia ice cream is special for its unique flavor, creamy texture, and rich history. It’s a treat that brings happiness and nostalgia, making it a beloved choice for many. Now, let’s dive into the ingredients needed to make this delightful dessert!
Ingredients for Cherry Garcia Ice Cream
To create your own Cherry Garcia ice cream, you’ll need a few simple ingredients. Each one plays a vital role in achieving that creamy texture and delightful flavor. Here’s what you’ll need:
- 2 cups of fresh cherries: Pitted and halved, these will provide the sweet and tart flavor.
- 1 cup of cherry puree: You can make this by blending some of the fresh cherries.
- 1 cup of heavy cream: This adds richness and creaminess to the ice cream.
- 1 cup of whole milk: This helps to create a smooth texture.
- ¾ cup of granulated sugar: This sweetens the mixture perfectly.
- 1 teaspoon of vanilla extract: This enhances the overall flavor.
- ½ cup of chocolate chips: Use semi-sweet or dark chocolate for a delicious contrast.
These ingredients come together to create a delightful ice cream that’s bursting with flavor. The combination of fresh cherries and chocolate chips makes each scoop a treat. Plus, you can easily find these ingredients at your local grocery store. Now that you have everything ready, let’s move on to the step-by-step preparation of this delicious Cherry Garcia ice cream!
Step-by-Step Preparation of Cherry Garcia Ice Cream
Making Cherry Garcia ice cream at home is a fun and rewarding process. With just a few steps, you can create a creamy, delicious treat that everyone will love. Let’s break it down step by step!
Step 1: Prepare the Cherry Puree
First, you need to prepare the cherry puree. Start by taking 1 cup of fresh cherries. Make sure they are pitted and halved. Place the cherries in a blender or food processor. Blend them until smooth. If you prefer a chunkier texture, you can blend them less. Once done, set the puree aside. This will be the star of your ice cream!
Step 2: Mix the Base
Next, it’s time to mix the base for your ice cream. In a large mixing bowl, combine 1 cup of heavy cream and 1 cup of whole milk. Add ¾ cup of granulated sugar and 1 teaspoon of vanilla extract. Whisk the mixture until the sugar is fully dissolved. This step is crucial as it creates a smooth and creamy base for your ice cream.
Step 3: Combine Ingredients
Now, it’s time to bring everything together. Pour the cherry puree into the cream mixture. Stir gently to combine. Then, fold in the ½ cup of chocolate chips. Make sure they are evenly distributed throughout the mixture. This will ensure that every scoop has a delightful burst of chocolate and cherry flavor!
Step 4: Churn the Ice Cream
After combining the ingredients, it’s time to churn the ice cream. If you have an ice cream maker, pour the mixture into it and churn according to the manufacturer’s instructions. This usually takes about 20 to 25 minutes. If you don’t have an ice cream maker, don’t worry! You can still make this ice cream by placing the mixture in a shallow dish and stirring it every 30 minutes until it reaches a creamy consistency.
Step 5: Freeze and Serve
Once the ice cream has churned to a soft-serve consistency, transfer it to an airtight container. Smooth the top with a spatula and cover it tightly. Place the container in the freezer for at least 4 hours, or until it’s firm. When you’re ready to serve, scoop out the ice cream into bowls or cones. Enjoy the creamy, fruity goodness of your homemade Cherry Garcia ice cream!
Now that you know how to prepare this delightful treat, let’s explore some variations of Cherry Garcia ice cream that you can try!
Variations of Cherry Garcia Ice Cream
While the classic Cherry Garcia ice cream is a beloved favorite, there are many fun variations to explore. These adaptations allow you to enjoy the same delicious flavors while catering to different dietary preferences or simply adding a twist. Let’s dive into two popular variations!
Dairy-Free Cherry Garcia Ice Cream
If you’re looking for a dairy-free option, you can easily make Cherry Garcia ice cream without dairy products. Start by substituting the heavy cream and whole milk with coconut milk or almond milk. These alternatives provide a creamy texture while keeping the ice cream light and refreshing.
Here’s how to make it:
- 2 cups of fresh cherries: Pitted and halved.
- 1 cup of cherry puree: Blend some of the fresh cherries.
- 1 cup of coconut milk: Use full-fat for creaminess.
- ¾ cup of granulated sugar: Sweeten to taste.
- 1 teaspoon of vanilla extract: For added flavor.
- ½ cup of dairy-free chocolate chips: Ensure they are vegan-friendly.
Follow the same preparation steps as the original recipe. This dairy-free version is just as delicious and perfect for those with lactose intolerance or a vegan lifestyle!
Cherry Garcia Ice Cream with Nuts
For a delightful crunch, consider adding nuts to your Cherry Garcia ice cream. Chopped almonds or walnuts pair beautifully with the cherries and chocolate. They add a satisfying texture and a nutty flavor that complements the sweetness.
To make this variation, simply:
- Prepare the classic Cherry Garcia ice cream as described earlier.
- Before churning, fold in ½ cup of chopped nuts of your choice.
This addition not only enhances the flavor but also boosts the nutritional value. Nuts are a great source of healthy fats and protein, making your ice cream a bit more wholesome.
These variations allow you to enjoy Cherry Garcia ice cream in new and exciting ways. Whether you choose the dairy-free option or add nuts for crunch, each version is sure to delight your taste buds. Now, let’s move on to some cooking notes to ensure your ice cream turns out perfectly!
Cooking Note for Cherry Garcia Ice Cream
When making Cherry Garcia ice cream, a few cooking notes can help you achieve the best results. These tips will ensure that your ice cream is creamy, flavorful, and a true delight to enjoy. Let’s explore some important points to keep in mind!
First, always use fresh cherries when possible. Fresh cherries not only taste better but also provide a vibrant color and texture. If fresh cherries are out of season, frozen cherries can be a good alternative. Just make sure to thaw and drain them before use to avoid excess moisture in your ice cream.
Next, pay attention to the temperature of your ingredients. For the best results, use cold heavy cream and milk. This helps the mixture churn more effectively, resulting in a creamier texture. If you have time, chill your mixing bowl and utensils in the refrigerator before starting. This small step can make a big difference!
Additionally, don’t skip the churning step. Churning incorporates air into the mixture, which is essential for a light and fluffy ice cream. If you’re using an ice cream maker, follow the manufacturer’s instructions carefully. If you’re making it by hand, remember to stir every 30 minutes until it reaches the desired consistency.
Lastly, patience is key when freezing your ice cream. After churning, allow it to freeze for at least 4 hours. This will help it firm up properly. If you try to scoop it too soon, it may be too soft and difficult to serve. Once it’s ready, you can enjoy your homemade Cherry Garcia ice cream!
By following these cooking notes, you’ll be well on your way to creating a delicious and creamy Cherry Garcia ice cream that everyone will love. Now, let’s look at some serving suggestions to make your dessert even more enjoyable!
Serving Suggestions for Cherry Garcia Ice Cream
Once you’ve made your delicious Cherry Garcia ice cream, it’s time to think about how to serve it! There are many fun and creative ways to enjoy this delightful treat. Let’s explore some pairing options and serving ideas that will elevate your ice cream experience.
Pairing with Toppings
Toppings can take your Cherry Garcia ice cream to the next level. Here are some tasty options to consider:
- Whipped Cream: A dollop of whipped cream adds a light and fluffy texture. It complements the creamy ice cream perfectly.
- Chopped Nuts: Sprinkle some chopped almonds or walnuts on top for a crunchy contrast. Nuts add flavor and a satisfying bite.
- Chocolate Sauce: Drizzle warm chocolate sauce over your ice cream for an extra chocolatey treat. It’s a sweet addition that chocolate lovers will adore.
- Fresh Cherries: Top your ice cream with a few whole cherries for a burst of freshness. They enhance the cherry flavor and look beautiful!
- Sprinkles: Add colorful sprinkles for a fun and festive touch. They make your dessert visually appealing, especially for kids.
Feel free to mix and match these toppings to create your perfect scoop. The combination of flavors and textures will make each bite exciting!
Creative Serving Ideas
Serving your Cherry Garcia ice cream can be just as fun as making it! Here are some creative ideas to impress your family and friends:
- Ice Cream Sundae: Create a classic sundae by layering your Cherry Garcia ice cream with toppings in a tall glass. Add whipped cream, nuts, and a cherry on top for a delightful presentation.
- Ice Cream Sandwich: Use two cookies to make an ice cream sandwich. Place a scoop of Cherry Garcia ice cream between chocolate chip cookies for a delicious treat.
- Milkshake: Blend a scoop of Cherry Garcia ice cream with milk to create a creamy milkshake. Serve it in a tall glass with a straw for a refreshing drink.
- Fruit Bowl: Serve your ice cream in a bowl filled with fresh fruit. Berries, bananas, or even more cherries can enhance the flavor and add a healthy twist.
- Waffle Cone: Serve your ice cream in a waffle cone for a classic ice cream shop experience. It’s fun to eat and adds a crunchy texture!
These serving suggestions will make your Cherry Garcia ice cream even more enjoyable. Whether you’re hosting a party or just treating yourself, these ideas will impress everyone. Now that you have some serving options, let’s move on to tips for making the best Cherry Garcia ice cream!
Tips for Making the Best Cherry Garcia Ice Cream
Creating the perfect Cherry Garcia ice cream is all about attention to detail. With a few helpful tips, you can elevate your homemade ice cream to a whole new level. Here are some essential tips to ensure your Cherry Garcia ice cream turns out creamy, flavorful, and utterly delicious!
First, always use ripe cherries. The sweetness and flavor of ripe cherries make a significant difference in your ice cream. Look for cherries that are firm and have a deep red color. If you can, taste a few to ensure they are sweet and juicy!
Next, consider chilling your mixing bowl and utensils before starting. This simple step helps keep the cream cold, which is crucial for achieving a smooth texture. A cold bowl helps the mixture churn better, resulting in creamier ice cream.
When blending the cherry puree, you can adjust the sweetness to your liking. If your cherries are particularly tart, feel free to add a bit more sugar to the puree. Taste as you go to find the perfect balance of flavors.
Another tip is to let your ice cream base sit in the refrigerator for at least an hour before churning. This allows the flavors to meld together and enhances the overall taste. Plus, a colder base churns more effectively, leading to a smoother texture.
While churning, keep an eye on the consistency. You want it to reach a soft-serve texture before transferring it to the freezer. If it’s too soft, it may not freeze well. If you’re using a manual method, remember to stir every 30 minutes until it reaches the desired creaminess.
Lastly, be patient when freezing your ice cream. After churning, allow it to freeze for at least 4 hours. This step is essential for achieving that perfect scoopable texture. If you try to serve it too soon, it may be too soft and difficult to enjoy.
By following these tips, you’ll be well on your way to making the best Cherry Garcia ice cream. Each scoop will be a delightful blend of creamy, fruity, and chocolatey goodness. Now, let’s break down the time needed to make this delicious treat!
Breakdown of Time for Cherry Garcia Ice Cream
Understanding the time needed to make Cherry Garcia ice cream can help you plan your dessert-making adventure. Here’s a simple breakdown of the time required for each step, so you know exactly what to expect!
Prep Time
The prep time for Cherry Garcia ice cream is quite manageable. You’ll spend about 15 to 20 minutes gathering your ingredients and preparing the cherry puree. This includes washing, pitting, and halving the cherries, as well as blending them into a smooth puree. It’s a quick and easy process that sets the stage for your delicious ice cream!
Cooking Time
When it comes to cooking time, the actual mixing and churning of the ice cream will take around 30 to 40 minutes. This includes:
- Mixing the cream, milk, sugar, and vanilla (about 5 minutes).
- Combining the cherry puree and chocolate chips (about 5 minutes).
- Churning the mixture in an ice cream maker (20 to 25 minutes).
If you’re using a manual method, remember to factor in the time spent stirring every 30 minutes until it reaches the desired consistency.
Total Time
In total, you should expect to spend about 4 to 5 hours from start to finish. This includes:
- Prep time: 15 to 20 minutes.
- Cooking time: 30 to 40 minutes.
- Freezing time: At least 4 hours.
While the active time is relatively short, the freezing time is essential for achieving that perfect scoopable texture. So, plan ahead and allow enough time for your Cherry Garcia ice cream to freeze properly!
Now that you have a clear understanding of the time involved, let’s take a look at the nutritional information for this delightful treat!
Nutritional Information for Cherry Garcia Ice Cream
When indulging in Cherry Garcia ice cream, it’s good to know what you’re enjoying. Understanding the nutritional content can help you make informed choices. Here’s a breakdown of the key nutritional information for a typical serving of this delicious treat.
Calories
A single serving of Cherry Garcia ice cream, which is about half a cup, contains approximately 250 to 300 calories. This number can vary based on the specific ingredients used, such as the type of cream or sugar. While it’s a sweet treat, enjoying it in moderation can fit into a balanced diet.
Protein
In terms of protein, each serving of Cherry Garcia ice cream provides around 4 to 5 grams. The protein mainly comes from the milk and cream used in the recipe. While it’s not a high-protein dessert, it does contribute a small amount to your daily intake.
Sodium
As for sodium content, a serving typically contains about 50 to 70 milligrams. This is relatively low, making Cherry Garcia ice cream a suitable option for those watching their sodium intake. However, it’s always wise to check the specific ingredients you use, as some chocolate chips or added toppings may increase the sodium levels.
Overall, Cherry Garcia ice cream can be a delightful treat to enjoy occasionally. With its rich flavors and creamy texture, it’s a dessert that brings joy. Just remember to savor each scoop and enjoy it as part of a balanced lifestyle!
FAQs about Cherry Garcia Ice Cream
Can I use frozen cherries for Cherry Garcia Ice Cream?
Yes, you can use frozen cherries for Cherry Garcia ice cream! Frozen cherries are a great alternative, especially when fresh cherries are out of season. Just make sure to thaw them first and drain any excess liquid. This will help maintain the right texture in your ice cream. Blending the thawed cherries into a puree will still give you that delicious cherry flavor you love!
How long does homemade Cherry Garcia Ice Cream last?
Homemade Cherry Garcia ice cream can last in the freezer for about 2 to 3 weeks. To keep it fresh, store it in an airtight container. Make sure to press a piece of plastic wrap directly onto the surface of the ice cream before sealing the container. This helps prevent ice crystals from forming and keeps your ice cream creamy and delicious!
Can I make Cherry Garcia Ice Cream without an ice cream maker?
Absolutely! You can make Cherry Garcia ice cream without an ice cream maker. Simply pour the mixture into a shallow dish and place it in the freezer. Every 30 minutes, take it out and stir vigorously with a fork. Repeat this process until the ice cream reaches a creamy consistency, which usually takes about 2 to 3 hours. This method may require a bit more effort, but the results will still be delicious!
What can I substitute for chocolate chips in Cherry Garcia Ice Cream?
If you want to substitute chocolate chips in your Cherry Garcia ice cream, there are several options. You can use chopped dark chocolate, white chocolate, or even chocolate chunks for a different texture. For a healthier twist, consider using cacao nibs, which provide a rich chocolate flavor without added sugar. You can also try adding crushed cookies or candy pieces for a fun variation!
Conclusion on Cherry Garcia Ice Cream
In conclusion, making Cherry Garcia ice cream at home is a delightful experience that combines creativity and flavor. This creamy treat is not only easy to prepare but also offers a wonderful way to enjoy the sweet and tart taste of cherries paired with rich chocolate. Whether you’re making it for a special occasion or just to satisfy a sweet craving, this ice cream is sure to impress.
Final Thoughts on Making Cherry Garcia Ice Cream
As you embark on your Cherry Garcia ice cream journey, remember that the key to success lies in using fresh ingredients and following the steps carefully. Don’t hesitate to experiment with variations, like adding nuts or trying a dairy-free version. Each twist can bring a new layer of enjoyment to this classic dessert.
Moreover, serving your homemade ice cream with fun toppings or creative presentations can elevate the experience for you and your guests. The joy of sharing a scoop of Cherry Garcia ice cream with loved ones is truly special. So, gather your ingredients, roll up your sleeves, and get ready to indulge in a delicious treat that’s sure to bring smiles all around!
Now that you have all the knowledge and tips, it’s time to make your own Cherry Garcia ice cream. Enjoy every creamy, fruity bite, and don’t forget to share your creations with friends and family. Happy ice cream making!
Relevant Recipes Link:
Looking to indulge in more delightful treats and comforting recipes? Look no further than these mouthwatering options:
- Creamy Vanilla Ice Cream: A Delicious Summer Treat
- Cherry Chocolate Ice Cream Cake: Perfect for Summer Celebrations
- Cheesy Garlic Bread: A Must-Try Comfort Food Recipe
For more fantastic recipes and food inspiration, follow us on Pinterest!